
Incorrect wheelchair configuration causes preventable shoulder injuries in nearly 70% of manual wheelchair users within two years of use. When your chair isn’t set up properly, every push strains joints and muscles, leading to chronic pain that limits independence. Following evidence-based clinical guidelines from RESNA and PVA, this guide shows exactly how to set up a wheelchair for optimal biomechanics, safety, and daily comfort. You’ll learn precise positioning techniques that distribute weight correctly, prevent repetitive strain, and transform your mobility experience—all based on the 35 critical standards used by rehabilitation professionals.
The core principle is non-negotiable: “The person cannot conform to the wheelchair, but the wheelchair must conform to the individual.” This isn’t just theory—it’s your protection against upper limb damage. Whether you’re configuring a new Quickie Life, Youngster 3, or any standard manual model, these steps apply universally. Skip this setup process, and you risk inefficient propulsion, pressure sores, and dangerous instability during transfers. Do it right, and you gain smoother movement, reduced fatigue, and preserved joint health for years to come.
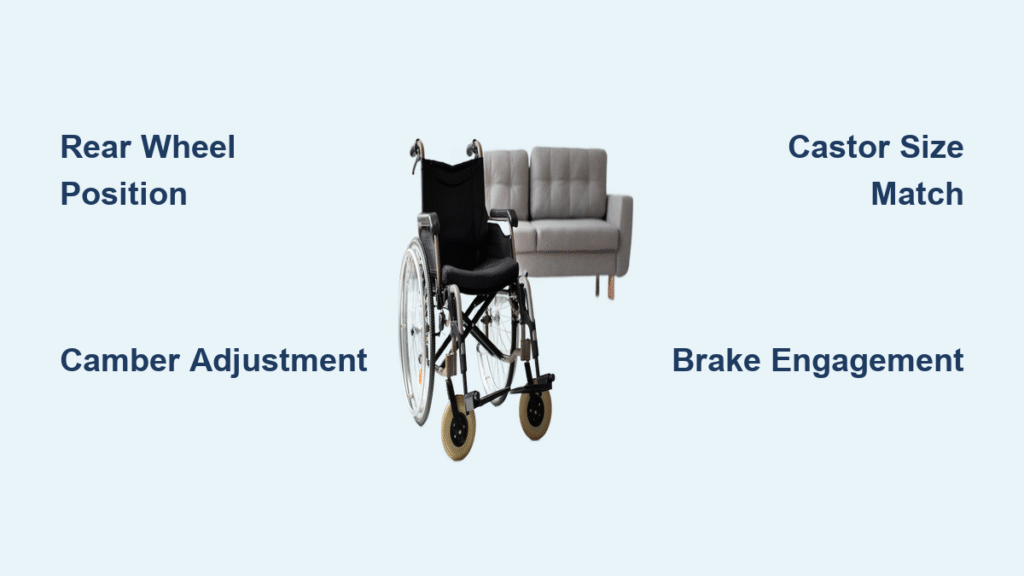
Position Rear Wheels for Optimal Biomechanics
Find Your Exact Wheel Position Using Finger Placement
Your rear wheel placement directly determines propulsion efficiency and injury risk. Here’s the clinician-approved method to set up a wheelchair wheel position correctly:
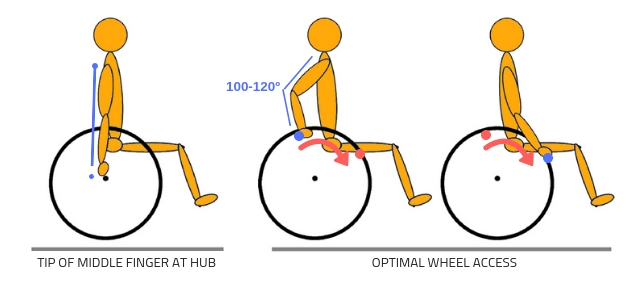
- Sit fully in the wheelchair with arms relaxed at your sides
- Place your middle finger’s tip at the wheel hub’s center point
- Verify your elbow forms a 120° angle when reaching the top push position
Critical check: If your elbow bends less than 100° or more than 120°, readjust the wheel position immediately. This angle prevents wrist hyperextension and shoulder impingement during daily use. After positioning, test weight distribution by lifting slightly off the seat—you should feel 70-80% of your weight over the rear wheels. If front castors lift too easily, move wheels slightly backward; if the chair tips forward, move wheels forward incrementally.
Adjust Camber for Stability and Efficient Propulsion
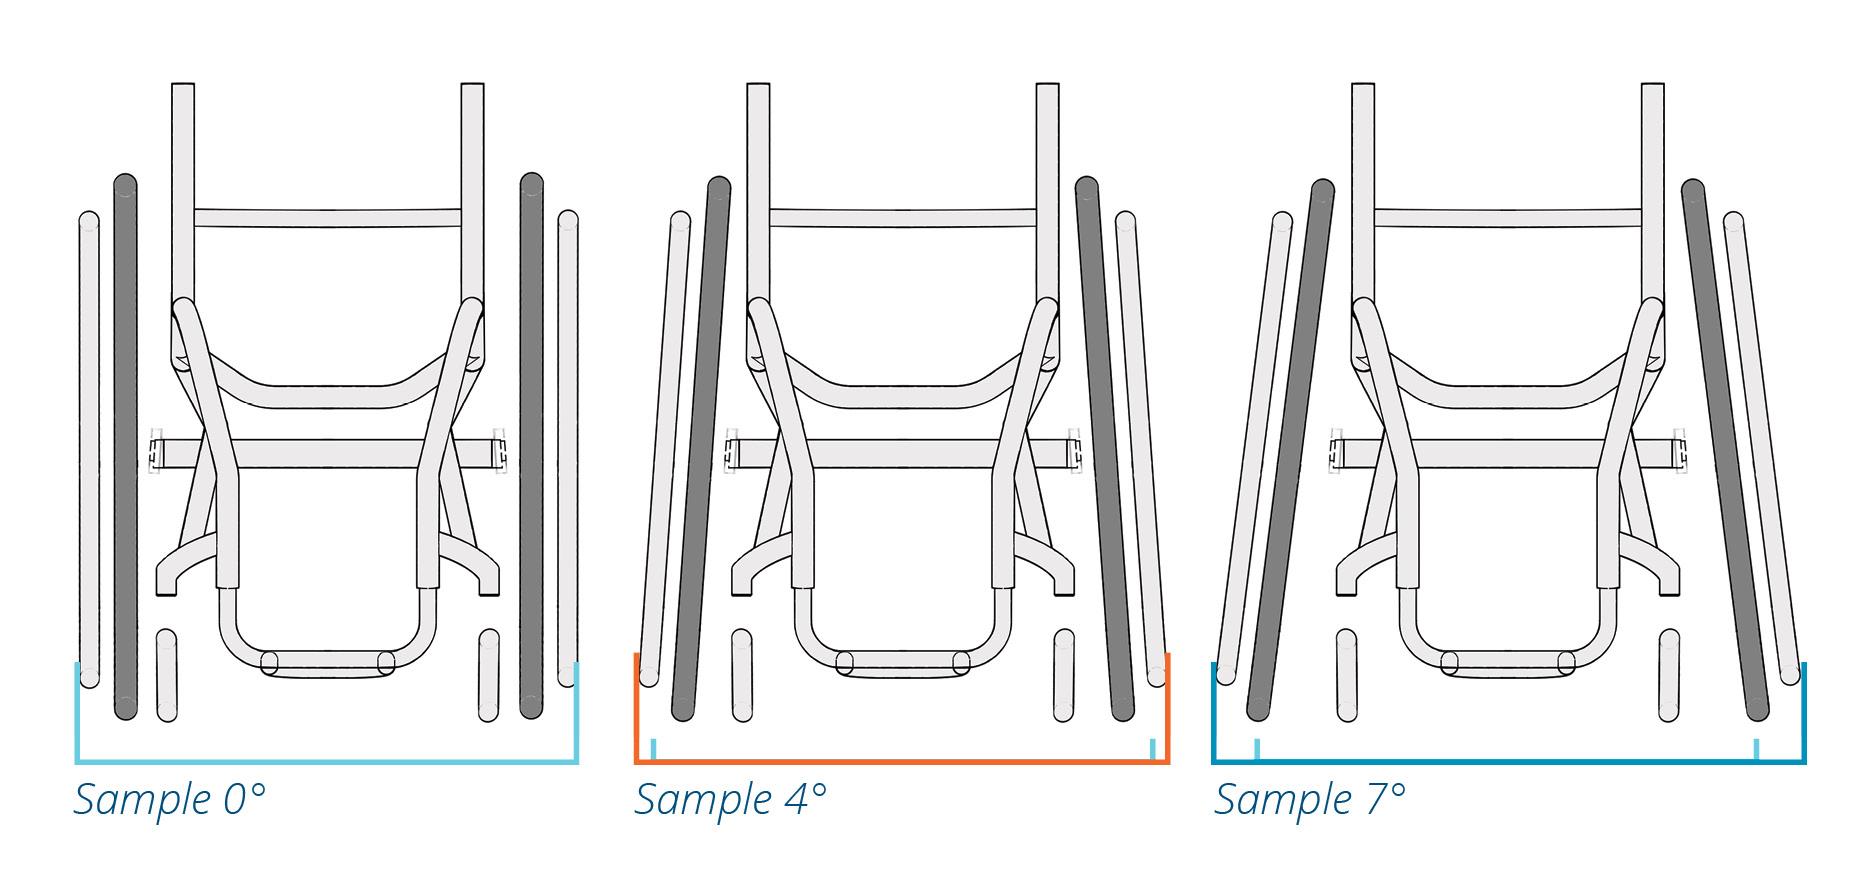
Most standard wheelchairs like the Argon2 or Neon2 allow camber adjustment (inward wheel tilt). Proper camber brings three critical benefits:
– Reduces wrist strain by keeping palms flat during pushes
– Improves lateral stability when turning corners
– Shortens indoor turning radius by 15-20%
For everyday use, set camber between 0°-3°. Higher angles (3°-6°) suit active users needing quick direction changes but reduce narrow-space maneuverability. Always adjust both sides equally using the axle plate bolts—uneven camber causes pulling to one side and accelerated tire wear. After adjustment, spin each wheel freely; wobbling indicates misalignment requiring professional correction.
Configure Front Castors for Your Daily Environment
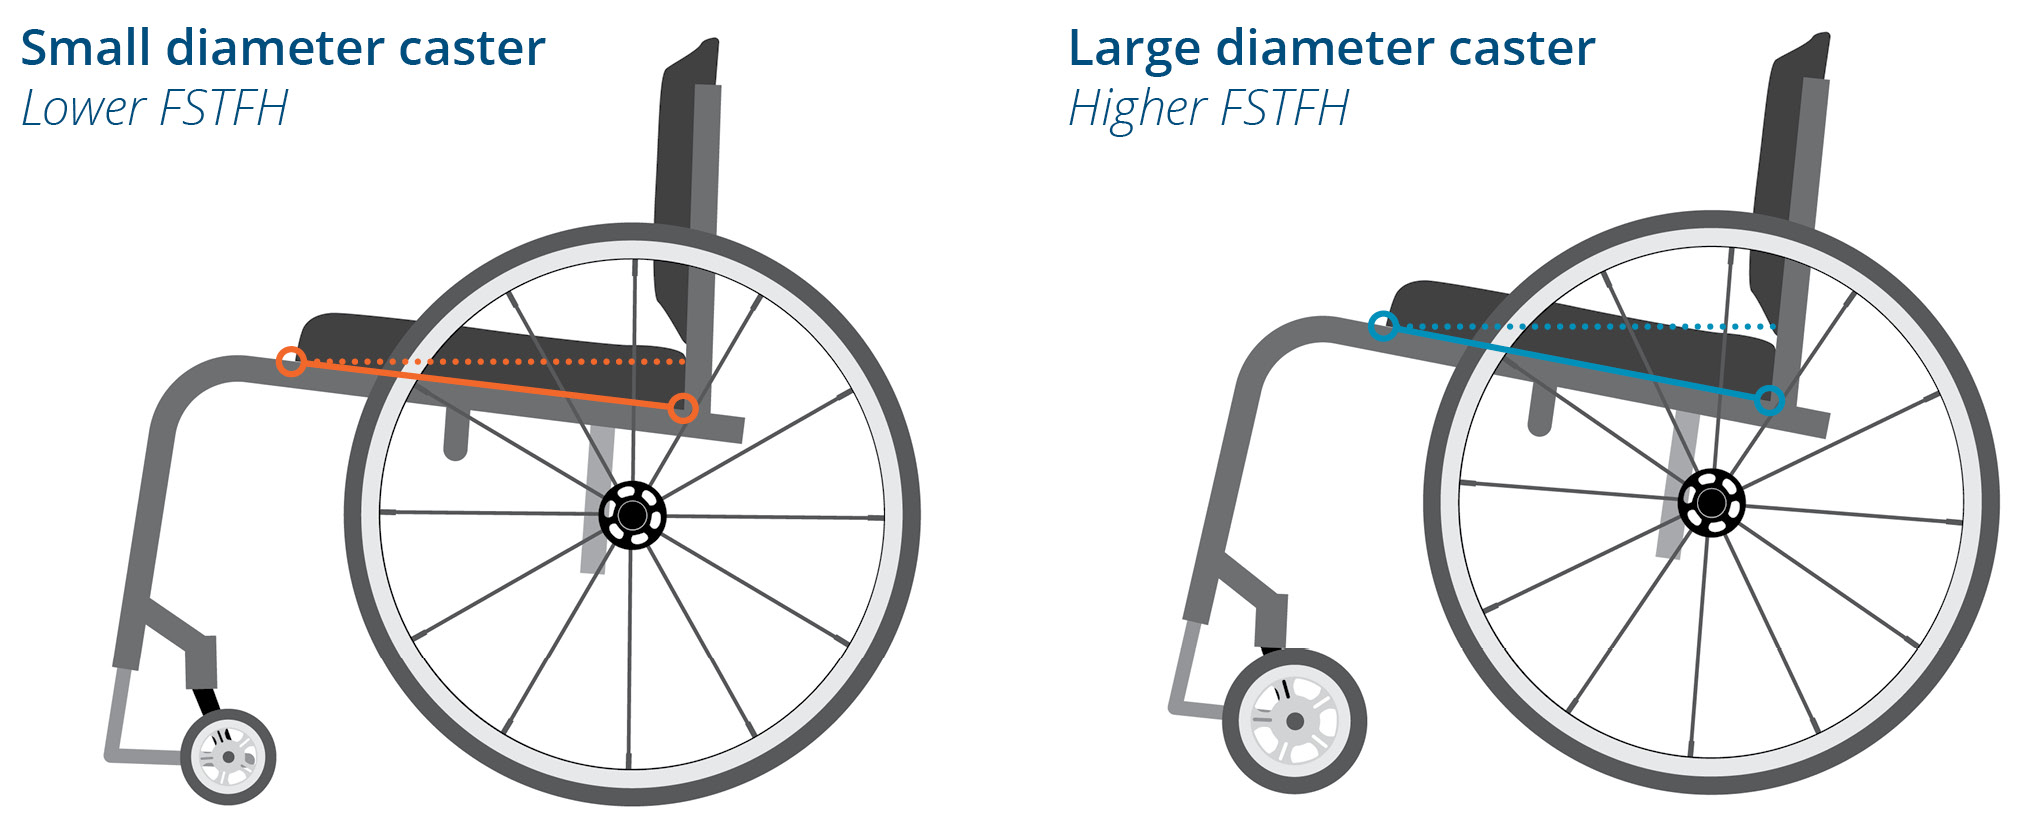
Match Castor Size to Your Primary Terrain
Choosing the wrong castor size is one of the top setup mistakes. Your environment dictates the optimal size:
Indoor-focused users (3-4 inch castors):
✓ Tighter turning in doorways and bathrooms
✓ Reduced footplate interference during propulsion
✓ Lighter overall chair weight
Outdoor-focused users (5-6 inch castors):
✓ Smoother transitions over curbs and gravel
✓ Better obstacle clearance for uneven surfaces
✓ Increased stability on slopes
Pro tip: If you use your wheelchair in both settings (e.g., Quickie Life R), choose 4-inch castors. They provide the best compromise—adequate outdoor capability without sacrificing indoor agility. Never install castors larger than your footplate clearance; scraping causes dangerous tripping during transfers.
Lock and Release Wheelchair Brakes Correctly
Engage Brakes for Transfer Safety
Brake failure causes 30% of wheelchair-related falls during transfers. Follow this exact sequence:
1. Position chair on level surface with feet flat on footplates
2. Push brake levers downward firmly until you hear a distinct click
3. Attempt to push the chair forward—wheels must not rotate
Critical warning: Always lock brakes before transferring, even on carpeted floors. Test engagement by placing one hand on the seat and gently pushing the frame. If wheels move, disengage and repeat with more downward force.
Release Brakes Without Strain
Improper release strains shoulders during daily use:
1. Stand facing chair with feet shoulder-width apart
2. Place palms flat on brake levers
3. Lift upward smoothly until click releases
4. Verify both wheels spin freely by rotating manually
If levers feel stiff, apply silicone lubricant to pivot points—never force movement. Sticky brakes indicate worn mechanisms needing replacement before daily use.
Adjust Leg Rests for Pressure-Free Support
Remove Leg Rests Without Bending
Straining during removal causes back injuries. Do this instead:
1. Press release lever forward (toward footplate)
2. Swing leg rest outward fully
3. Pull lever completely forward
4. Lift straight up—no twisting
Visual cue: When correctly released, the leg rest floats 1-2 inches above hanger pins before lifting. Forcing it indicates incomplete lever engagement.
Customize Length to Prevent Knee Pressure
Improper length causes popliteal pressure sores:
1. Remove leg rest for easier access
2. Unlatch adjustment lever below holes
3. Press both buttons simultaneously into holes
4. Slide bar until thigh is parallel to seat with 2-3 finger-widths between seat edge and knee crease
5. Ensure audible click as buttons re-engage
Pro tip: Sit with legs extended—footplates should rest flat without hip rotation. If toes point inward, leg rests are too short.
Fold and Store Your Wheelchair Without Injury
Complete Safe Folding in 4 Steps
Incorrect folding causes pinched fingers and back strain:
1. Lock brakes and remove leg rests
2. Stand facing chair with knees bent (back straight)
3. Grasp seat frame near armrests—keep fingers clear of cross-brace
4. Pull upward while gently pushing armrests together
Critical: If the chair resists folding, check for trapped clothing or accessories. Never force mechanisms—this damages folding latches.
Unfold Correctly for Daily Use
Skipping proper unfolding risks collapse during transfers:
1. Lock brakes on folded chair
2. Pull armrests slightly apart while pressing down on seat frame
3. Continue pushing down and out until frame clicks fully open
4. Test stability by applying weight to seat before sitting
Visual check: Fully unfolded, the seat frame must form a rigid rectangle with no gaps at cross-brace junctions.
Perform Quick Setup Verification Before Every Use
Check Critical Biomechanical Points
Spend 30 seconds verifying these before moving:
– ✅ Elbow angle hits 120° at top push position
– ✅ Hand accesses wheel between 10-2 o’clock positions
– ✅ 70-80% weight on rear wheels (test by lifting seat slightly)
– ✅ Foot clearance: 1+ inch between footplate and castor
Troubleshooting: If wheels slip during propulsion, increase rear weight distribution by moving wheels slightly backward.
Identify 5 Common Setup Mistakes Immediately
These errors cause most preventable injuries:
1. Wheels too far back: Causes excessive shoulder strain (elbow angle <100°)
2. Oversized castors: Creates indoor maneuvering hazards and footplate scraping
3. Leg rests too long: Creates pressure behind knees during sitting
4. Seat too low: Forces excessive trunk bending during propulsion
5. Unverified brake engagement: Leads to transfer falls
Fix immediately: If you notice any of these during verification, stop using the chair until corrected.
When to Contact a Wheelchair Specialist Immediately
Recognize Pain as a Setup Red Flag
Persistent discomfort isn’t normal—it signals dangerous misconfiguration:
– Shoulder pain during first 5 pushes
– Numbness in hands after 10 minutes of use
– Pressure sores developing on thighs or tailbone
– Difficulty reaching wheels without torso rotation
Critical action: Stop using the chair and contact your healthcare provider. These indicate immediate risk of permanent tissue damage.
Monthly Maintenance Checks to Preserve Fit
Your body changes require ongoing adjustments:
– Weekly: Test brake engagement, castor spin, and leg rest security
– Monthly: Recheck wheel position (elbow angle at push top), tire pressure, and frame integrity
– After medical changes: Reconfigure entirely following new physical limitations
Pro tip: Keep a setup log noting measurements—this tracks subtle changes requiring professional intervention.
Your wheelchair is an extension of your body. When properly configured using these evidence-based steps, it becomes a tool for independence rather than a source of pain. Remember: Correct setup prevents the shoulder injuries that sideline 68% of manual wheelchair users within five years. If any step feels uncertain, stop and consult your rehabilitation specialist—your long-term mobility depends on it. For model-specific guidance, always prioritize manufacturer instructions over general procedures, and visit msk.org/pe for clinically reviewed resources.


