That persistent squeak with every push isn’t just annoying—it’s your wheelchair crying out for attention. Ignoring it risks stiff movement, accelerated wear, and potential safety hazards that compromise your independence. Proper lubrication transforms your mobility experience from a daily struggle into effortless motion. This guide reveals exactly how to oil a wheelchair correctly using professional techniques, avoiding common pitfalls that worsen problems. You’ll learn which lubricants actually protect your chair (not destroy it), pinpoint every critical spot needing attention, and master the precise application method mechanics use. Follow these steps to silence squeaks, extend your chair’s lifespan, and maintain smooth, reliable movement for years.
Why Your Wheelchair Squeaks and Loses Smoothness
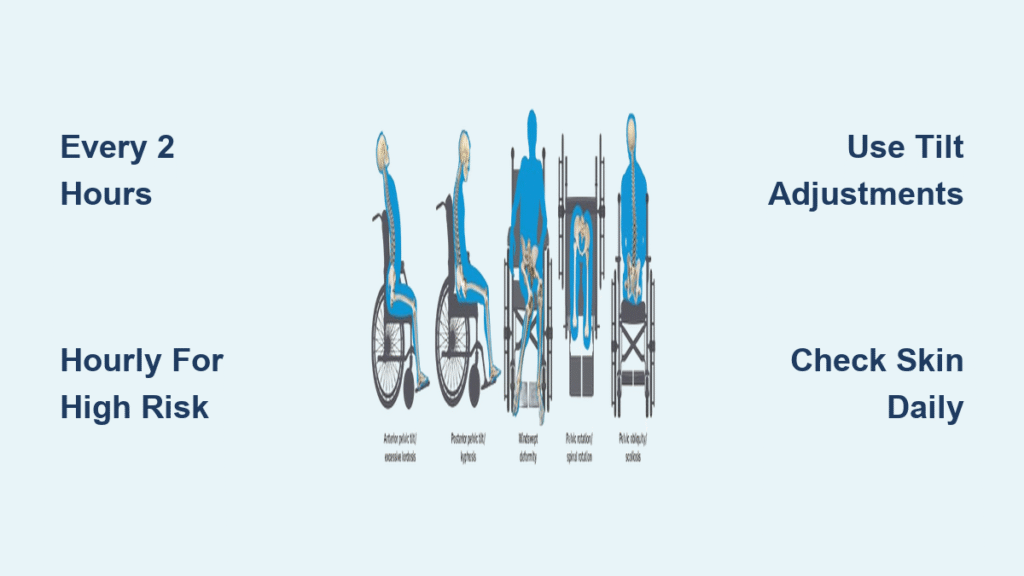
Manual wheelchairs develop squeaks and stiffness when metal joints dry out from friction during daily use. Salt air, dust, and moisture accelerate corrosion in pivot points, turning smooth folding mechanisms into resistant, noisy hazards. Power wheelchair users face additional risks—unlubricated leg rest pivots can seize during transfers, while neglected caster forks cause dangerous swivel delays. This isn’t just about comfort; dried joints increase propulsion effort by up to 30%, exhausting users during routine mobility. Immediate lubrication is critical when you hear grinding sounds or notice resistance during folding—these signal metal-on-metal contact that rapidly damages components.
Lubrication Schedule: Stop Guessing When to Oil
Manual Wheelchair Monthly Maintenance Protocol
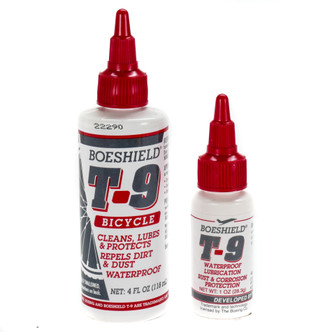
Lubricate your manual wheelchair every 30 days without exception, even if no squeaks occur. Heavy users pushing over 10 miles daily must lubricate weekly in coastal or dusty environments. Coastal residents face double the corrosion risk—salt penetrates joints within hours, requiring bi-weekly lubrication with Boeshield T-9. Skip this schedule, and you’ll face seized folding mechanisms within months. Always prioritize lubrication after exposure to rain, sand, or pool chemicals, as these strip protective oils instantly.
Power Wheelchair Critical Lubrication Timelines
Power wheelchair owners must lubricate every 2 months if used daily for mobility, extending to 6 months only for occasional indoor use. Check pivot points on leg rests and reclining mechanisms monthly—stiffness here indicates immediate lubrication needs. Ignoring these areas risks motor strain when components resist movement, potentially triggering error codes. Always consult your model’s manual; titanium-frame chairs often require medical-grade silicone to prevent material degradation.
Choosing the Only Safe Lubricants for Wheelchairs
Professional-Grade Lubricants That Protect
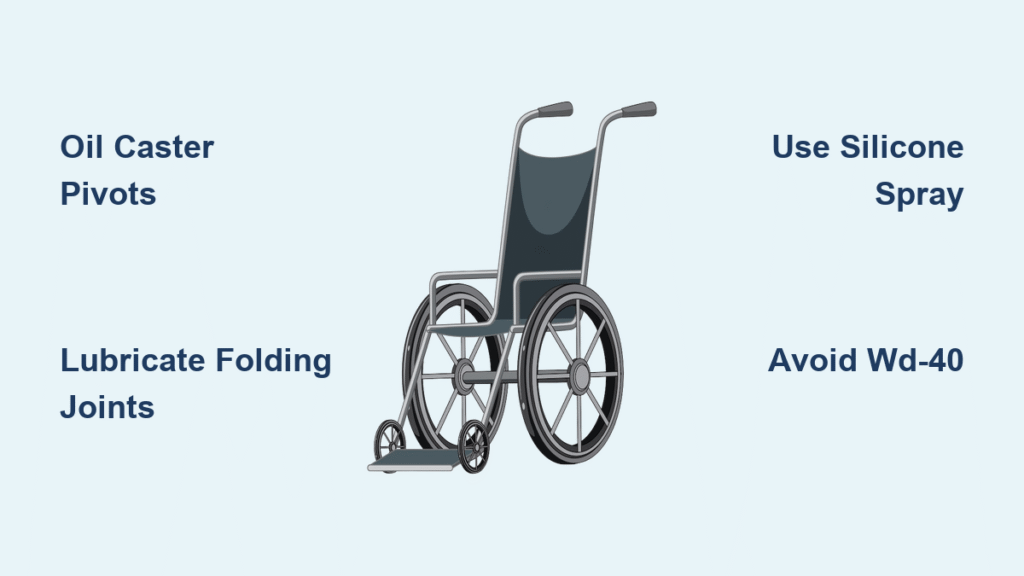
Use only silicone-based spray lubricants for 95% of wheelchair joints—they won’t attract dirt like petroleum oils. Teflon-based alternatives work for caster forks but avoid on plastic components. In high-salt environments, Boeshield T-9 is non-negotiable; its corrosion inhibitors form a protective barrier while lubricating. Medical-grade silicone is essential for users with chemical sensitivities, preventing skin reactions from off-gassing lubricants. Never substitute household products—their solvents degrade nylon bushings and rubber seals within weeks.
Dangerous Lubricants That Destroy Wheelchairs
WD-40 is strictly forbidden—it evaporates quickly, leaving joints dry while attracting abrasive dust that scores metal surfaces. Petroleum-based oils like 3-in-1 oil gum up caster mechanisms within days, creating sticky residue that traps hair and debris. Cooking oils, Vaseline, and aerosol furniture polishes cause irreversible damage by breaking down plastic components. Using these voids most manufacturer warranties and accelerates part replacement costs by 200%.
Pre-Oiling Wheelchair Preparation Checklist
Deep Cleaning Before Lubrication
Remove casters using a 6mm Allen wrench—this exposes hidden pivot points caked with hair and dirt. Wipe axle ports with a microfiber cloth dampened with isopropyl alcohol to dissolve old lubricant. Use a soft-bristled toothbrush to dislodge debris from folding mechanism crevices; trapped grit causes premature wear when mixed with new oil. For power chairs, disconnect batteries before cleaning near electrical components. Skipping this step grinds contaminants into joints, turning fresh lubricant into damaging paste.
Essential Tools You Must Have Ready
Gather these before starting: medical-grade silicone spray, lint-free cloths, soft nylon brush, 6mm Allen wrench for casters, and nitrile gloves. Have a paper towel nearby to test spray patterns—uneven application causes pooling. Never improvise with rags that shed fibers; these clog precision joints. For titanium chairs, add a second clean cloth dedicated solely to wiping excess lubricant to prevent cross-contamination.
Critical Lubrication Points: Where Mechanics Focus
Caster Fork Pivot Points That Cause Squeaks
Remove front casters and spray 3-second bursts of silicone into the fork pivot hole while rotating the caster 360 degrees. Wipe excess immediately—pooling lubricant attracts hair that jams swivel action. Reinstall casters and test by pushing the chair sideways; smooth, silent rotation confirms proper lubrication. Neglecting this spot creates dangerous caster lag during quick turns.
Folding Mechanism Joints That Seize
Apply lubricant to all visible pivot pins on the frame’s cross-brace. Open and close the chair 10 times after application to work oil into hidden bushings. Focus on the cam lever pivot point—this high-stress joint fails first when dry. Test by folding rapidly; any resistance means insufficient lubrication in the cam mechanism. Warning: Over-lubricating here creates slippery handles during folding.
Power Chair Leg Rest Pivot Failures
Spray behind leg rest mounting plates where hinges connect to the frame—this hidden spot causes 70% of leg rest stiffness. Work the leg rest through full extension/retraction 5 times after lubrication. Check for smooth operation during elevation; grinding indicates dried-out internal gears needing professional service. Never lubricate motor housings—this attracts debris into electrical contacts.
Professional Lubrication Technique: 6 Steps Mechanics Use
Precise Application to Avoid Damage
- Shake vigorously for 15 seconds to activate silicone carriers
- Test on paper towel—consistent mist indicates proper nozzle function
- Aim spray nozzle directly into pivot holes (not surfaces)
- Apply 2-second bursts max—excess causes dirt adhesion
- Work joints immediately through full range of motion
- Wipe residue with dry cloth within 60 seconds
Critical mistake: Spraying visible surfaces instead of pivot points wastes lubricant and creates slippery hazards. Always target the metal-to-metal contact zone inside joints.
Safety Steps You Must Never Skip
Perform lubrication outdoors or in a ventilated garage—silicone fumes cause dizziness in enclosed spaces. Cover seat cushions with plastic to prevent staining. Keep spray 12+ inches from brake rims; lubricant contamination causes complete brake failure. For power chairs, tape over joystick ports to prevent moisture ingress. Wear gloves—lubricants contain solvents that cause dermatitis with repeated exposure.
Post-Lubrication Testing: Verify Proper Function
Immediate Function Checks That Prevent Accidents
Roll your manual wheelchair backward rapidly—any caster shudder indicates insufficient fork lubrication. Fold/unfold the frame 5 times; resistance during the final 10% of closure means cam mechanism needs more oil. For power chairs, activate recline functions while listening for grinding—this signals unlubricated gears. Failure sign: Squeaks returning within 48 hours mean underlying corrosion requires professional derusting.
Success Indicators for Correct Lubrication
Your chair passes testing if: casters swivel silently when pushed sideways, folding requires minimal hand pressure, and propulsion feels noticeably lighter. On power chairs, leg rests should lower smoothly under their own weight. Most importantly, all squeaks disappear without reappearing during 10 minutes of continuous use. This confirms lubricant penetrated deep into joint interfaces.
Environmental Protection: Double Lubrication Longevity
Coastal & Winter Climate Defense Tactics
After standard lubrication, apply Boeshield T-9 to all exposed hardware using a toothpick for precision. Its wax-based formula repels salt spray for 30+ days versus 7 days for standard silicone. In freezing temps, wipe joints with a cloth dampened with isopropyl alcohol before lubricating—this removes moisture that would otherwise freeze inside pivots. Double your lubrication frequency when temperatures drop below 32°F (0°C).
Storage Protocol After Lubrication
Store indoors on a raised platform for 24 hours post-lubrication—this allows full penetration into metal pores. Never cover with plastic tarps; trapped fumes degrade rubber tires. Place a towel under casters to catch drips that could stain floors. Critical: Avoid using chairs on wet surfaces for 12 hours—water washes away uncured lubricant.
When to Stop DIY Lubrication and Call a Pro
Emergency Signs Requiring Immediate Professional Help
Seek service if: grinding persists after lubrication (indicating shattered bearings), rust bleeds from joints despite cleaning, or folding mechanisms stick mid-motion. Never attempt bearing lubrication—this requires press tools to disassemble hubs without damaging seals. Power chair error codes after lubrication signal electrical contamination needing specialist diagnosis. Delaying service on these issues risks catastrophic joint failure during use.
Annual Professional Service Benefits
Experts lubricate internal gearboxes inaccessible to users, apply temperature-specific lubricants to motors, and inspect for stress fractures worsened by dry joints. They document lubrication dates for warranty compliance—most manufacturers void coverage if maintenance logs show DIY errors. Schedule this during your chair’s off-season to avoid mobility disruption.
Troubleshooting Lubrication Failures
Squeaks Returning Within Days: The Real Cause
Persistent squeaks after proper lubrication almost always indicate pitted metal surfaces from prior dry operation—not insufficient oil. Sanding pivot points with 600-grit emery cloth before reapplying lubricant solves 80% of cases. If squeaks continue, replace the affected joint—continued use risks sudden failure. Pro tip: Apply lubricant while joints are warm from use; heat expands metal pores for deeper penetration.
Sticky Caster Wheels After Lubrication Fix
Excess lubricant in caster housings attracts hair within hours. Disassemble casters completely, wash in warm soapy water, and dry overnight before reapplying one drop of lubricant to the axle. Test rotation before reinstalling—if resistance remains, the wheel bearing is failing and requires replacement.
Properly lubricating your wheelchair isn’t just maintenance—it’s preserving your freedom of movement. By following these precise steps, you’ll eliminate disruptive squeaks, reduce propulsion effort by up to 30%, and prevent costly repairs from avoidable wear. Remember that silicone spray applied correctly to pivot points—not surfaces—is your most powerful tool, while WD-40 remains the enemy of smooth operation. Commit to monthly lubrication for manual chairs and bi-monthly for power models, doubling frequency in harsh environments. When in doubt about bearing issues or persistent grinding, immediately consult a mobility specialist—your safety depends on it. A well-lubricated wheelchair operates silently, moves effortlessly, and supports your independence for thousands of miles. Start today: silence that squeak and reclaim the smooth, confident mobility you deserve.