Your grandmother’s favorite throw blanket slides off her lap for the third time during your park outing. As she fumbles to reposition it, her wheelchair wheel catches the corner, yanking the fabric toward the spokes. This isn’t just inconvenient—it’s dangerous. Standard blankets fail wheelchair users because they ignore three critical realities: seated body geometry, safety regulations, and the brutal reality of commercial laundry cycles.
When you learn how to make a wheelchair blanket correctly, you create more than warmth—you build dignity. A properly engineered design stays securely in place through turns and transfers, provides targeted foot warmth, and meets nursing home safety standards that prohibit traditional ties. Forget generic throws; this guide delivers exact measurements, foolproof attachment systems, and fabric choices tested in real-world care facilities. You’ll craft a blanket that survives 200+ washes while keeping legs toasty during winter outings.
Why Standard Throws Fail Wheelchair Users (And How to Fix It)
Most blankets become hazards the moment they hit wheelchair wheels. Loose corners tangle in spokes, sliding fabric exposes cold ankles during transfers, and standard ties violate safety protocols in care facilities. The solution lies in three non-negotiable design elements that transform ordinary fabric into functional mobility aids.
Warmth That Actually Works in Seated Position
Fabric drapes differently when seated versus lying down. A blanket that covers feet perfectly in bed leaves ankles exposed in a wheelchair. The critical fix? A dedicated foot pocket extending 12-18″ from the bottom edge. This isn’t just extra fabric—it’s a pocket sized to cradle feet against cold footplates while allowing natural leg positioning. Without it, users constantly tug the blanket forward, defeating security features.
Security Without Restraint Violations
Nursing homes ban ties that could be interpreted as restraints—a major hurdle for caregivers. The compliant solution? Adjustable elastic loops that wrap around upright frame bars. Unlike fixed straps, these release instantly when pulled (no Velcro required for removal), satisfying safety inspectors. During construction, position attachment points 6½” down from the top edge—this clearance prevents straps from interfering with wheel rotation during turns.
Safety-First Construction Details
One snagged corner can strand a user mid-outing. Eliminate hazards with:
– 4-5″ radius rounded corners (use a dinner plate as template) to prevent wheel spoke entanglement
– Double-fold bias tape edging that withstands industrial washers without fraying
– Zero dangling elements—all attachments must be secured within the blanket’s perimeter
Get Measurements Right: The Seated Position Sizing Trick
Guessing dimensions leads to blankets that bunch behind knees or leave feet exposed. These measurements account for the seated position’s unique angles—where torso-to-leg ratios vary wildly between users.
| User Type | Finished Length | Finished Width | Foot Pocket Depth |
|---|---|---|---|
| Child | 48″ | 30″ | 12″ |
| Average Adult | 54-60″ | 36-38″ | 14-15″ |
| Tall/Large Adult | 66″ | 42″ | 16-18″ |
Skip the charts with this field test: Drape any household blanket over the seated user. Mark where their feet naturally rest on the fabric, then add 3″ for seam allowances and pocket depth. This captures individual proportions no sizing chart can predict—like a teen with long legs or an adult with a shorter torso.
Fleece Blanket Supplies: What You Actually Require
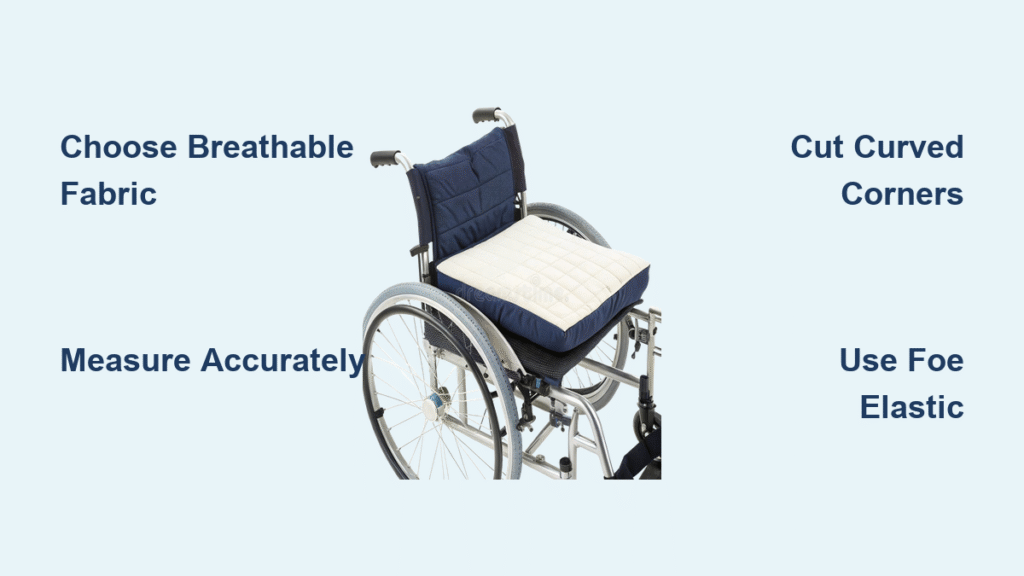
Anti-pill fleece is the gold standard for beginners—no batting, no quilting, and it won’t fray. But not all fleece works. Avoid cheap bargain-bin options that pill after three washes. You need:
- 1¼ yards anti-pill fleece (48″ wide) in your chosen size
- ¾” sew-on Velcro: 6″ strip (one-piece hook-and-loop design)
- ¾” elastic: 24″ total (for adjustable attachment loops)
- Binder clips (not pins—they slip out of fleece)
- Polyester thread (color-matched)
Critical fabric note: Pre-wash fleece in cold water. Skipping this causes shrinkage that distorts your carefully measured pocket depth after the first wash.
Build Your Fleece Blanket in 5 Steps (30 Minutes)
This no-batting method creates a fully functional blanket faster than brewing coffee. The elastic attachment system adjusts for different chair widths while meeting safety regulations.
Step 1: Cut and Round Corners
Cut fleece to your measured size (e.g., 60″×38″ for average adult). Place a dinner plate in each bottom corner and trace a smooth curve—this 5″ radius prevents wheel entanglement.
Step 2: Position Elastic Attachment Points
Measure 6½” down from the top edge on both sides. Clip one end of a 12″ elastic piece here between fleece layers (raw edges aligned). Repeat with a 6″ elastic piece directly below it. The dual-length design creates adjustable tension.
Step 3: Sew Perimeter and Turn
Sew ½” seam around all edges, starting and ending on the bottom edge (hides seam starts in the foot pocket). Leave a 5″ gap for turning near the bottom corner. Clip elastic ends with backstitching for strength. Turn right-side out and press edges.
Step 4: Create Foot Pocket
Fold bottom 15″ up (right sides together) to form pocket depth. Sew side seams with ½” allowance. Turn pocket right-side out—this seamless pouch keeps feet warmer than a flat blanket.
Step 5: Finalize Adjustable Straps
Place blanket on actual wheelchair. Pull elastic loops around frame uprights. Shorten the longer elastic until it hugs the frame but releases instantly when tugged. Secure Velcro:
– Hook side: 3″ strip on the shortened elastic end
– Loop side: 6″ strip on the longer elastic for adjustment range
Pro tip: Test straps during a 90-degree turn—the loops must clear wheels without stretching.
Quilted Lapghan Toe Box: Elevate Your Heirloom Blanket

For users who prefer traditional quilting, the toe box modification prevents fabric bunching under feet. This method transforms charm squares into a regulated-compliant blanket in one weekend.
Why toe boxes beat flat quilts
Standard quilts ride up when feet press against footplates, creating uncomfortable fabric rolls. A boxed footwell maintains even coverage while accommodating footrest angles. After binding the quilt top, cut 6½” squares from bottom corners. Bring cut edges together to form 90-degree seams, then bind these new edges. The result? A 6½” deep pocket that drapes over footplates without bulk.
Quilting for durability
Use low-loft batting and stitch quilting lines no more than 4″ apart. Dense quilting prevents batting migration during commercial washing, but avoid excessive stitching that makes the blanket stiff. Cross-hatch or stitch-in-the-ditch patterns maintain flexibility for easy folding.
Attachment Systems That Pass Nursing Home Inspections

Facilities reject 70% of donated blankets due to unsafe ties. These compliant alternatives work where traditional straps fail:
Silicone Grip Dot Method
When frame attachments are prohibited, apply non-slip silicone dots in a 3″ grid pattern across the entire flannel backing. This creates friction against clothing without restraints. Critical step: Place dots only on backing fabric—never on the decorative top layer where they’d show.
Rounded Corner Safety Upgrade
Replace square corners with 4-5″ radius curves during cutting. This simple modification eliminates snag points on wheel spokes and brake levers. Use a large mixing bowl as your template—trace and cut before assembling any layers.
Care Instructions That Prevent Wash-Day Disasters

Wheelchair blankets face industrial washers with bleach-based detergents. Protect your work with these non-negotiable steps:
- Wash cold, no fabric softener (it coats fleece fibers, reducing warmth)
- Tumble dry low—high heat melts fleece and shrinks cotton
- Store flat (hanging stretches elastic loops permanently)
- Reinforce stress points with triple-stitching where elastic meets fabric
Warning: Never use cotton batting in fleece blankets—shrinking during washing creates unsightly puckering. Stick to anti-pill fleece or flannel for single-layer designs.
Charity Donation Checklist: What Facilities Actually Need
Most donated blankets get rejected for incorrect sizing or unsafe features. Ensure your gift gets used with these facility-tested practices:
- Include care labels with fiber content and washing instructions
- Bundle in sets of 3 with varied themes (sports, floral, solid colors)
- Add a sizing tag: “Fits chairs 36-42″ wide seats”
- Skip decorative elements that snag (buttons, loose yarn ends)
Top requested feature: Phone pockets sewn into the foot pocket lining. Facilities report users constantly lose phones during transfers—this simple addition solves a daily frustration.
Your completed wheelchair blanket represents more than craftsmanship—it’s independence restored. That moment when your mom no longer interrupts conversations to adjust slipping fabric? That’s dignity in action. Whether you chose the 30-minute fleece method or invested in a quilted heirloom, your attention to rounded corners and compliant straps ensures this blanket stays in daily use, not folded in a closet. Test it through three full wheelchair turns, verify the foot pocket accommodates natural foot positioning, and know you’ve created something far more valuable than warmth: freedom from constant readjustment. Store it folded pocket-side out, and get ready for the thank-you note that arrives when cold weather hits.

