
Creating accessible entryways shouldn’t require professional help when you know the right techniques. If your home needs a permanent solution for wheelchair access, learning how to make a concrete wheelchair ramp delivers decades of reliable service. Unlike temporary wooden alternatives that warp and deteriorate, a properly built concrete ramp withstands weather extremes while maintaining ADA compliance. This guide cuts through the confusion with field-tested methods for calculating slopes, building forms, and pouring concrete that won’t crack or slip.
ADA Compliant Slope Requirements for Your Ramp

Calculate Your Exact Ramp Length Correctly
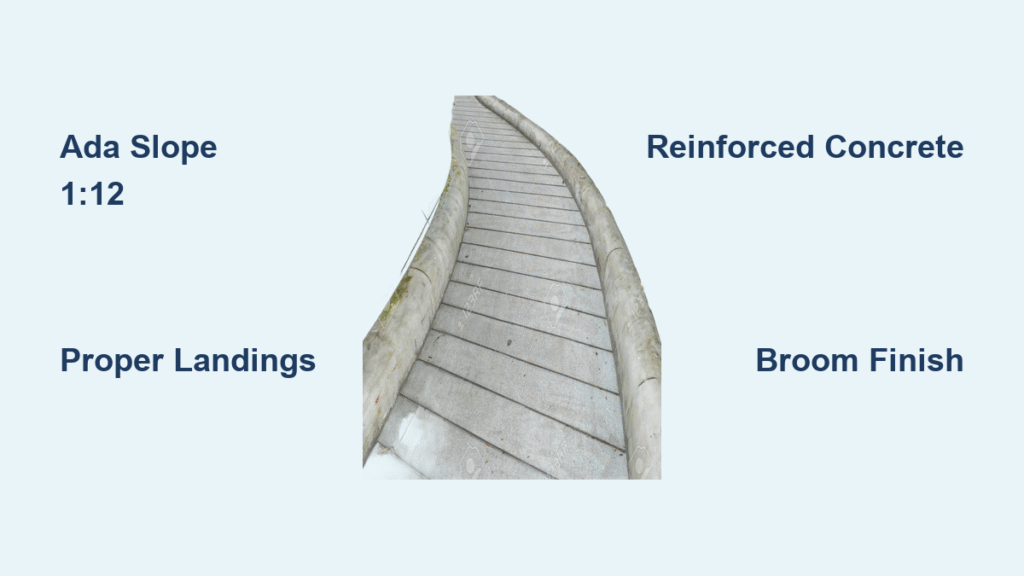
The 1:12 slope ratio is non-negotiable for safe wheelchair access—meaning every inch of vertical rise requires twelve inches of ramp length. Measure your porch height in inches, then multiply by 12 to determine your minimum ramp length. A standard 24-inch porch needs exactly 24 feet of ramp, plus additional space for landings.
Quick calculation formula:
– Measure total rise from ground to doorway in inches
– Multiply by 12 to get minimum ramp length in feet
– Add 5-6 feet for top and bottom landings
– Include intermediate landing every 30 inches of rise
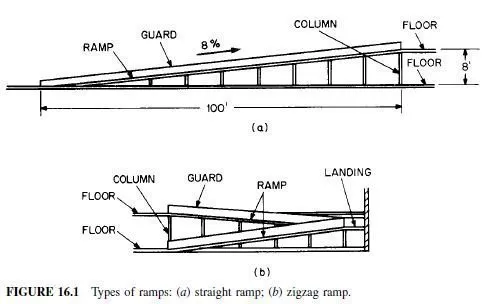
Install Mandatory Landing Areas
Landings aren’t optional extras—they’re critical safety components that prevent accidents. Position landings at both ends of your ramp and every 30 inches of vertical rise. Each landing must match your ramp’s width and extend at least 60 inches for wheelchair users to safely maneuver.
Landing requirements checklist:
– Minimum 36-inch width for residential use
– 60-72 inch length for wheelchair turning space
– Level surface with no more than 2% cross slope
– Slip-resistant finish matching the ramp surface
Meet Width and Edge Protection Standards
Your concrete wheelchair ramp must be at least 36 inches wide for residential use, though 48 inches provides more comfortable passage. Install 4-inch high curbs along open sides to prevent wheels from slipping off. When your ramp has drop-offs exceeding 30 inches, add guardrails meeting ADA height specifications of 31-34 inches above the ramp surface.
Essential Materials Checklist for Concrete Ramp Success
Concrete Mix Specifications That Won’t Fail
Choose a 3000-4000 PSI concrete mix with stiff consistency—thick enough to hold its shape when formed into a ball. This prevents slumping on your carefully calculated slope while remaining workable during placement. Avoid adding excess water, as this weakens the concrete and causes premature cracking.
Material quantities for an 8-foot ramp (24-inch rise):
– 2.5 cubic yards of concrete
– 4 inches of compacted gravel subbase
– 3/4-inch exterior plywood for forms
– 2×4 pressure-treated lumber for bracing
– 6×6 wire mesh reinforcement
Form Building Supplies That Hold Under Pressure
Use 3/4-inch exterior plywood cut at precise angles matching your slope calculation for the ramp sides. Stake forms every 2-3 feet with 2×4 pressure-treated lumber driven 12 inches into the ground. Diagonal bracing every 4 feet prevents form blowouts when concrete pressure builds during pouring.
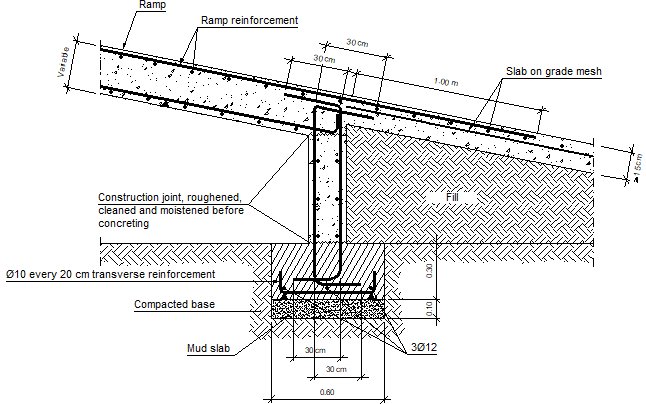
Reinforcement Choices for Long-Term Durability
For most residential concrete wheelchair ramp projects, 6×6 wire mesh reinforcement provides sufficient strength. In commercial applications or areas with heavy usage, upgrade to #3 rebar spaced at 12-inch centers both ways. Proper reinforcement prevents cracking from ground movement and extends your ramp’s service life significantly.
Site Preparation: Avoid Costly Foundation Mistakes

Mark Your Ramp Location with Precision
Select the most frequently used entrance with level, stable ground for your concrete wheelchair ramp. Avoid areas with poor drainage or steep surrounding grades that could compromise stability. Mark your complete ramp outline using spray paint, including space for all required landings—remembering that a 24-inch rise requires 24 feet of ramp plus landing space.
Critical location considerations:
– Direct path from parking area to entrance
– Level approach at bottom landing area
– Adequate space for full ramp length
– Clearance from underground utilities
Excavation Depth That Prevents Future Problems
Dig to accommodate 4 inches of gravel subbase plus your concrete thickness (minimum 4 inches). In frost-prone regions, extend footings below local frost depth—typically 36-48 inches—to prevent heaving. Slope the subbase 1% away from your house to ensure proper drainage and prevent water accumulation.
Subbase Installation for Unshakable Stability
Install 4 inches of 3/4-inch crushed stone as your gravel subbase, compacting in 2-inch layers using a plate compactor. This creates a stable foundation that prevents settling and provides essential drainage. Proper compaction is non-negotiable—soft spots in your subbase will become weak points in your finished ramp.
Form Construction That Won’t Fail During Pour
Angle Calculation Methods for Perfect Slope
Determine your form angle using the rise/run relationship—1:12 slope equals 4.76 degrees. Create a template from scrap plywood to ensure both side forms match perfectly. Use a speed square to mark precise cutting lines and test fit forms before final assembly.
Angle cutting pro tips:
– Calculate: Angle = arctan(rise/run)
– Cut both sides simultaneously for symmetry
– Use shims to fine-tune slope accuracy
– Verify with a 4-foot level before pouring
Form Assembly Process That Withstands Pressure
Assemble forms on a flat surface first, then position them in your excavation. Stake forms every 2 feet using 2×4 stakes driven deep into solid ground. Brace forms with diagonal supports to prevent bowing under concrete pressure—this is where most DIYers fail when building a concrete wheelchair ramp.
Isolation Joint Installation at Structure Connections
Install 1/2-inch asphalt-impregnated fiberboard where your ramp meets existing structures. This isolation joint prevents cracking from thermal expansion and differential settling. Without this critical component, your concrete ramp will develop stress cracks within the first year.
Concrete Placement Strategy for Professional Results
Mixing and Consistency Control That Prevents Slumping
Mix concrete to a stiff, workable consistency—similar to thick oatmeal. Test by forming a ball in your gloved hand; it should hold shape without slumping. Start with 80% of the recommended water and add sparingly while mixing to maintain strength. Soupy concrete will slide down your slope, ruining your carefully calculated gradient.
Pouring Sequence That Eliminates Voids
Begin pouring at the lowest point and work upward against the slope. Fill the form in 6-inch lifts, using a shovel to work concrete into corners and eliminate air pockets. Tap form sides gently with a hammer to release trapped air and create a smooth finish.
Surface Finishing Methods for Maximum Safety
Create a slip-resistant broom finish immediately after floating the surface. Work from bottom to top, pulling the broom across the slope—not down it—to create perpendicular texture grooves for maximum traction. Round all edges with a concrete edger to prevent chipping and create a professional appearance.
Curing and Form Removal for Crack-Free Results
Moist Curing Process That Builds Strength
Keep your concrete wheelchair ramp moist for 5-7 days using wet burlap, plastic sheeting, or curing compound. This prevents surface cracking and ensures maximum strength development. Begin curing as soon as the surface is firm enough to walk on without leaving footprints.
Form Removal Timing That Prevents Edge Damage
Wait at least 3 days before removing forms—longer in cool weather. Start with stakes, then carefully pry forms away from concrete edges using a pry bar with a protective shim. Patch any small voids with fresh mortar mix immediately after form removal.
Surface Sealing Application for Weather Protection
Apply concrete sealer after 28 days of curing for optimal weather protection. Choose a penetrating sealer for a natural appearance or film-forming sealer for enhanced protection. Reapply every 2-3 years to maintain protection against freeze-thaw cycles and de-icing chemicals.
Handrail Installation That Meets ADA Requirements
Wood Handrail Attachment Methods That Last
Install wood handrails using post anchors set in wet concrete or expansion anchors after curing. Space posts maximum 8 feet apart, maintaining 31-34 inch height above ramp surface. Use 4×4 pressure-treated posts with 2×6 top rails featuring rounded edges for comfortable gripping.
Metal Railing Systems for Maximum Durability
Metal handrails provide superior durability and ADA compliance with minimal maintenance. Install using base plates set in wet concrete or core-drill and epoxy anchors post-curing. Powder-coated aluminum offers the best longevity while maintaining attractive appearance.
Common Construction Mistakes That Ruin Concrete Ramps
Slope Miscalculations That Create Unsafe Access
The most frequent error involves incorrect slope calculations. Double-check your rise measurements before building forms—remembering that 1:12 is the maximum allowable slope under ADA standards. Even slight miscalculations make your ramp unusable for wheelchair access.
Form Failure Prevention Techniques
Inadequate bracing causes catastrophic form blowouts during pouring. Use stakes every 2 feet and diagonal bracing every 4 feet. Continuously check forms for level and plumb during concrete placement—once concrete starts flowing, it’s too late to fix alignment issues.
Surface Texture Errors That Create Slip Hazards
Smooth concrete surfaces become dangerously slippery when wet. Always apply texture—broom finish provides excellent traction. Avoid overworking the surface, which weakens concrete and creates dusting problems that compromise safety.
Maintenance and Long-Term Care for Decades of Service
Winter Weather Protection Strategies
Avoid damaging de-icing salts that accelerate concrete deterioration. Use sand for traction or calcium chloride for ice melting. Seal your concrete wheelchair ramp before the first winter to prevent freeze-thaw damage that causes spalling and surface deterioration.
Crack Monitoring and Repair Protocol
Inspect annually for cracks wider than 1/4 inch. Hairline surface cracks are normal; structural cracks require professional evaluation. Seal cracks promptly with concrete crack filler to prevent water infiltration and freeze damage that worsens over time.
Surface Renewal Techniques for Aging Ramps
Power wash annually and reseal every 2-3 years to maintain appearance and protection. For worn surfaces, apply concrete resurfacer to restore texture and appearance. Address drainage issues immediately to prevent foundation problems that compromise your ramp’s structural integrity.


