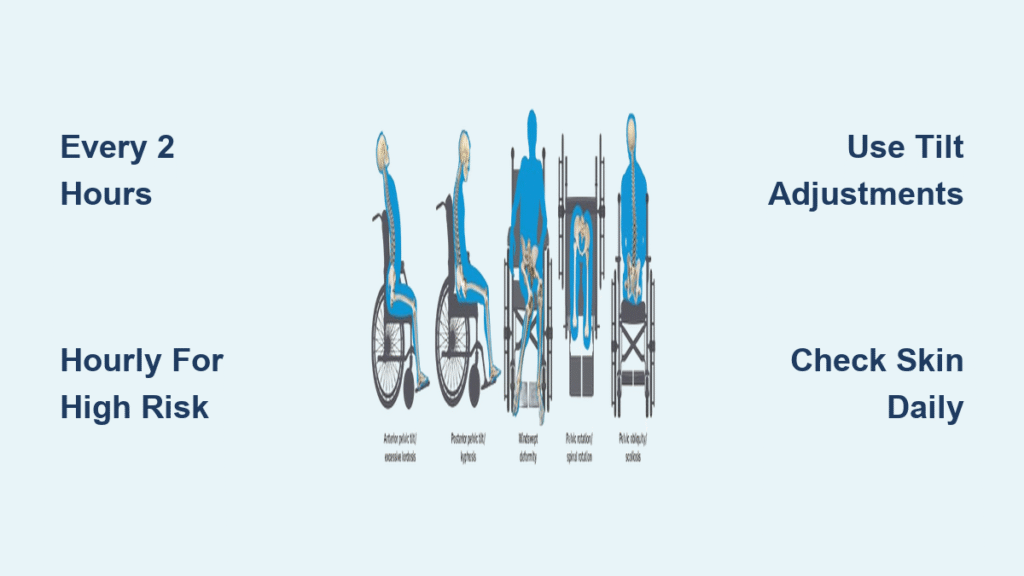
Your wheelchair cushion silently battles sweat, skin cells, and daily grime that can trigger pressure sores, skin infections, and stubborn odors. When neglected, trapped moisture compromises the cushion’s pressure redistribution—exactly what prevents life-threatening ulcers. This isn’t just about freshness; it’s critical health maintenance. After all, your cushion works tirelessly to protect your skin, so it deserves precise cleaning that extends its lifespan without causing damage.
Most users don’t realize dust, mold, and bodily fluids accumulate beneath the cover, creating breeding grounds for infections that cause eye/nasal irritation or worse. Weekly cover washing alone isn’t enough—you need type-specific protocols to avoid ruining expensive components. Whether you have foam, air cells, gel, or honeycomb cushions, this guide delivers manufacturer-approved methods that keep you safe and mobile. You’ll learn exactly how to clean every cushion type without voiding warranties or risking injury.
Essential Supplies for Every Cushion Type
Universal toolkit (all cushions):
– Mild detergent (liquid dish soap or unscented laundry detergent)
– Soft microfiber cloths or non-abrasive sponges
– Access to a large sink, shower, or bathtub
– Clean absorbent towels for drying
– 9:1 water-to-bleach solution (for disinfection only when approved)
Add these for specific cushions:
– Air cell cushions: Soft-bristle plastic brush for scrubbing between cells
– Foam cushions: Cornstarch to absorb accidental moisture
– Gel/fluid cushions: Disinfectant wipes for base cleaning
– Honeycomb cushions: Standard washing machine access
Critical Pre-Cleaning Inspection Steps
Before touching water, pull your cushion from the chair and photograph all positioning components—Velcro placements, directional arrows, and foam orientation marks. These tiny details affect posture support and pressure redistribution. Simultaneously, check for:
– Tears or worn seams in covers (worsen during washing)
– Cracks in gel/fluid chambers
– Mold growth between air cells
– Excessive compression in foam bases
Pro tip: Buy a second cover for rotation. This prevents sitting on bare foam while washing and doubles your cover’s lifespan by reducing wear.
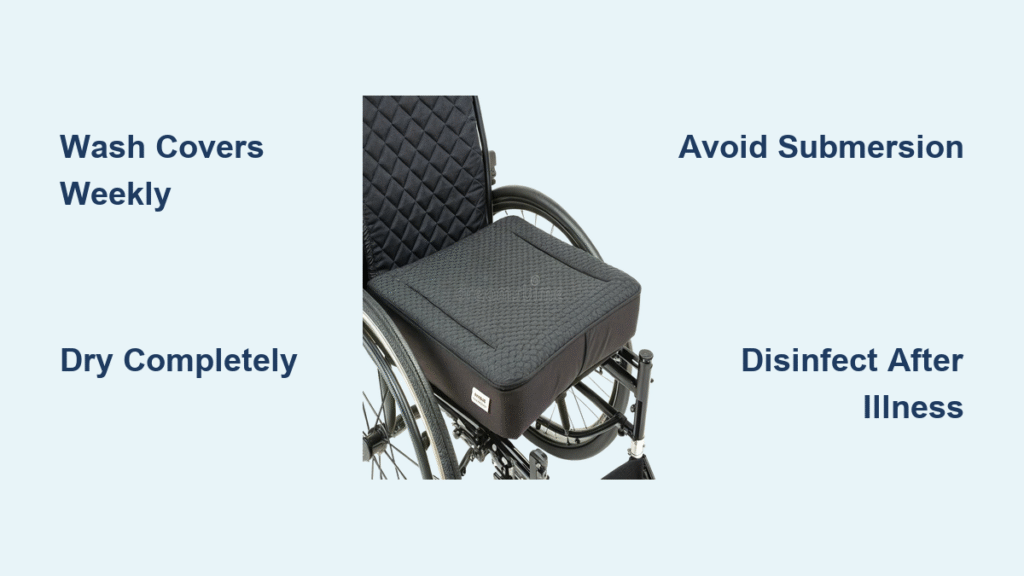
Weekly Cover Washing Protocol
Immediate Removal and Prep
Zip covers closed and turn them inside-out before removal to prevent snagging on wheelchair hardware. Never yank covers off forcefully—this strains stitching. If your cushion has dual covers (outer + incontinence layer), clean them separately per manufacturer instructions.
Safe Machine Washing Technique
Wash covers only in warm water on gentle cycle with mild detergent. Cold water works for delicate fabrics like cotton, but avoid hot water unless disinfecting. Crucially: never use industrial washers—their aggressive agitation permanently damages cushion covers. Skip fabric softeners and bleach unless specified for disinfection.
Drying Without Damage
Choose one method based on your cover material:
– Tumble dry low/no heat: Safest for most synthetics (check tags)
– Air dry: Hang on a clothesline away from direct sunlight
– Drip dry: Lay flat on clean towels, flipping hourly
Warning: High-heat drying shrinks covers and warps elastic. If air-drying, ensure complete dryness (24+ hours) before reassembly to prevent mildew.
Foam Cushion Cleaning: Open vs. Closed Cell
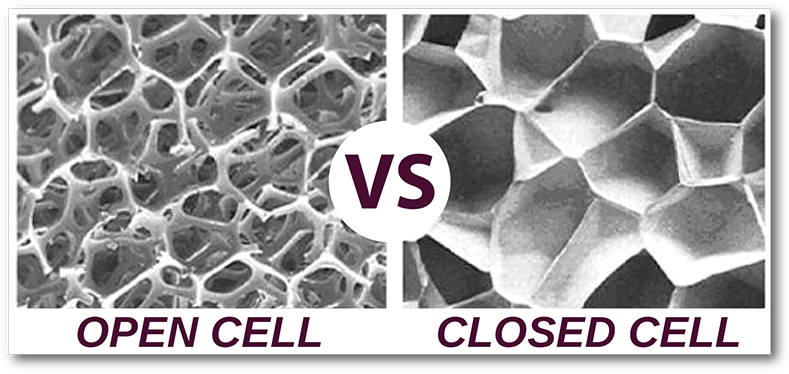
Open-Cell Foam (Highly Absorbent)
These porous cushions act like sponges—never submerge them. Instead:
1. Lightly wipe surfaces with a damp (not wet) cloth—no soap
2. Immediately blot excess moisture with a dry towel
3. Air-dry completely in a well-ventilated area (48+ hours)
Emergency fix for wet foam: Sprinkle cornstarch on damp spots. It pulls moisture out faster while preventing foam layers from sticking together. Brush off residue once fully dry.
Closed-Cell/Coated Foam (Water-Resistant)
Non-porous foam handles liquid better:
– Spray with mild cleaner or wipe with disinfectant wipes
– Mark all Velcro positions before removal—misalignment affects posture
– Air-dry upright to maintain shape
Never use bleach unless your manual explicitly permits it.
Air Cell Cushion Deep Cleaning (ROHO/Vicair)
Valve Safety Check
Critical step: Close the air valve completely before water exposure. Deflate all cells first—pressure changes during cleaning can rupture seams. If cells are stuck together from dried debris, do not force separation when dry.
Hand-Washing Process
- Rinse loose dirt between cells under lukewarm water
- Fill sink with warm water + 1 tbsp mild detergent
- Gently scrub all surfaces with soft plastic brush (no metal!)
- Rinse thoroughly until water runs clear
- Hang vertically to air-dry for 24+ hours
Disinfection After Illness
Mix 9 parts warm water + 1 part bleach. Keep cushion wet with solution for exactly 10 minutes, then rinse 3x. Confirm bleach is manufacturer-approved first—some air cells degrade with chlorine.
Gel/Fluid and Honeycomb Cushion Care

Gel/Fluid Cushion Protocol
Base cleaning only: Wipe with soapy water cloth, then dry with clean towel. Never machine wash—agitation ruptures internal chambers. For covers:
– Machine wash cold/gentle cycle
– Tumble dry low or air-dry
– Skip bleach (damages gel formulations)
Honeycomb Cushion Advantage
These flexible matrix cushions (like Varilite) are fully machine-washable:
– Remove cover and wash cushion directly in standard washer
– Tumble dry on low heat
– No special drying precautions needed—their durable design resists warping
Reassembly Without Errors

Critical Dryness Verification
Never reassemble damp components—moisture causes mold and foam breakdown. Test foam by squeezing: no water droplets should appear. For air cells, ensure no moisture in valve chambers.
Step-by-Step Positioning
- Place fluid/air insert on inner incontinence cover
- Align Velcro strips using your pre-removal photos
- Insert foam base into outer cover with zipper at rear (pelvic area)
- Match directional arrows for front/back orientation
- Zip closed without stretching fabric
Mistake to avoid: Placing foam upside-down ruins pressure redistribution. Check “top/bottom” labels religiously.
Disinfection When Sharing Equipment
Mandatory Disinfection Triggers
Clean with bleach solution only when:
– Recovering from illness (flu, staph, etc.)
– Sharing cushions between users
– Exposure to blood or bodily fluids
– Pandemic outbreak conditions
Component-Specific Disinfection
- Covers: 9:1 water/bleach soak for 10 minutes
- Air cells: Same solution (verify manufacturer approval first)
- Closed-cell foam: Disinfectant wipes only
- Gel inserts: Follow manual—bleach often damages them
Never disinfect open-cell foam—it traps chemicals against your skin.
Costly Mistakes That Destroy Cushions
Top 5 Errors (and Fixes)
- Submerging foam cushions → Ruins pressure redistribution. Fix: Only damp-wipe.
- High-heat drying → Shrinks covers and warps foam. Fix: Always air-dry or low heat.
- Forcing stuck air cells apart → Tears material. Fix: Soak in warm water first.
- Using towels on cushions → Creates dangerous pressure points. Fix: Use only approved covers.
- Skipping pre-cleaning photos → Misaligned posture support. Fix: Document everything.
Temperature cheat sheet: Cold water for delicate fabrics, warm for routine cleaning, hot only for disinfection (if approved).
Odor Elimination That Actually Works
Natural Solutions by Cushion Type
- Air cells: Add 1 cup white vinegar to final rinse water
- Foam: Prevent odors by ensuring 100% dryness—moisture causes 90% of smells
- Covers: Toss ½ cup baking soda into the wash cycle
Never ignore persistent odors—they signal trapped moisture breeding bacteria. For severe cases, contact your manufacturer; high-end cushions often require professional cleaning to maintain warranty coverage.
Maintenance Schedule That Prevents Damage
Weekly: Wash covers (takes 30 minutes)
Monthly: Full cushion inspection + base cleaning
After illness: Immediate disinfection
Before storage: Deep clean + 72-hour air-dry
Pro tip: Set phone reminders for cover washing. Consistent weekly cleaning prevents monthly deep-cleaning marathons and extends cushion life by 2+ years.
Your wheelchair cushion is a medical device—not just a seat. Proper cleaning prevents life-threatening pressure ulcers while protecting your investment. By following these type-specific protocols, you maintain optimal pressure redistribution, eliminate infection risks, and keep your cushion performing like new. Remember: When in doubt, consult your owner’s manual or contact the manufacturer directly. A few minutes of weekly care ensures your cushion continues supporting you safely for years to come.