Your wheelchair wheels determine where you can go and how comfortably you get there. Whether you’re dealing with a flat tire, worn tread, or upgrading to better performance, knowing how to change wheelchair wheels yourself saves money and keeps you mobile. This guide walks you through every step of replacing both drive wheels and caster wheels, from choosing the right tires to completing the installation safely. You’ll gain the confidence to maintain your mobility equipment independently and avoid being sidelined by unexpected wheel problems.
Why Wheelchair Wheel Condition Affects Your Daily Mobility
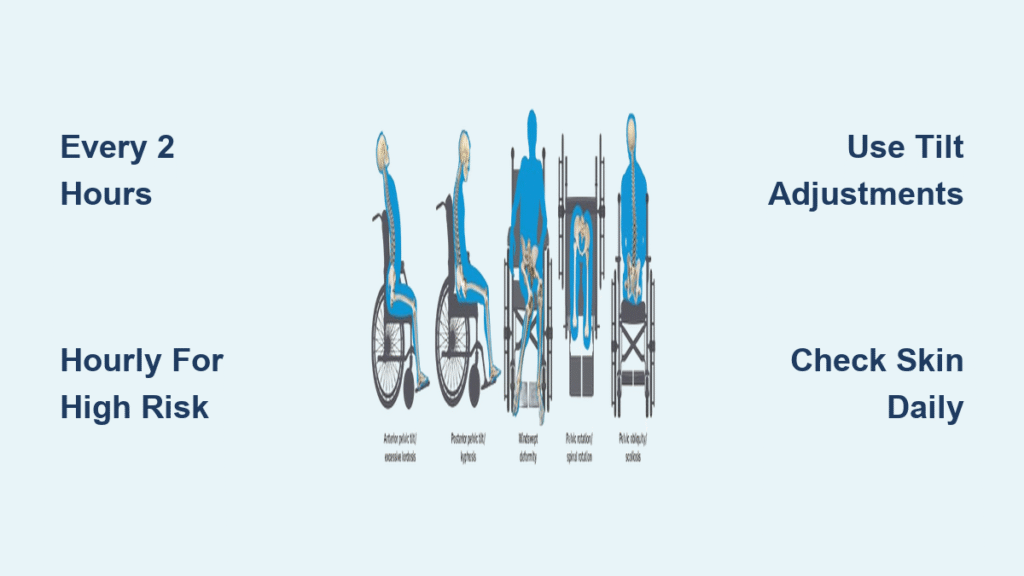
How Worn Wheels Compromise Safety and Independence
Damaged or worn wheelchair wheels directly impact your ability to navigate daily environments safely and efficiently. When tires lose their grip or develop uneven wear patterns, your chair may pull to one side, increasing the effort required to move and potentially causing strain injuries. Smooth, bald tires significantly reduce traction on wet surfaces or inclines, creating hazardous situations that could lead to accidents. Properly maintained wheels ensure you maintain control in all environments, from smooth indoor floors to uneven outdoor terrain, preserving your independence without unexpected limitations.
Recognizing Critical Warning Signs That Demand Immediate Action
Don’t wait until you’re stranded with a flat tire to address wheel issues. Visible cracks in rubber indicate structural weakness that could lead to sudden failure. If you notice your chair pulling noticeably to one side despite correct tire pressure, this signals alignment problems or uneven wear that affects steering control. Frequent air loss in pneumatic tires means you’re constantly at risk of being immobilized. Most importantly, if you hear unusual grinding or clicking sounds when rolling, this indicates potential bearing damage that could cause complete wheel failure. Regular inspections prevent these issues from escalating into mobility emergencies.
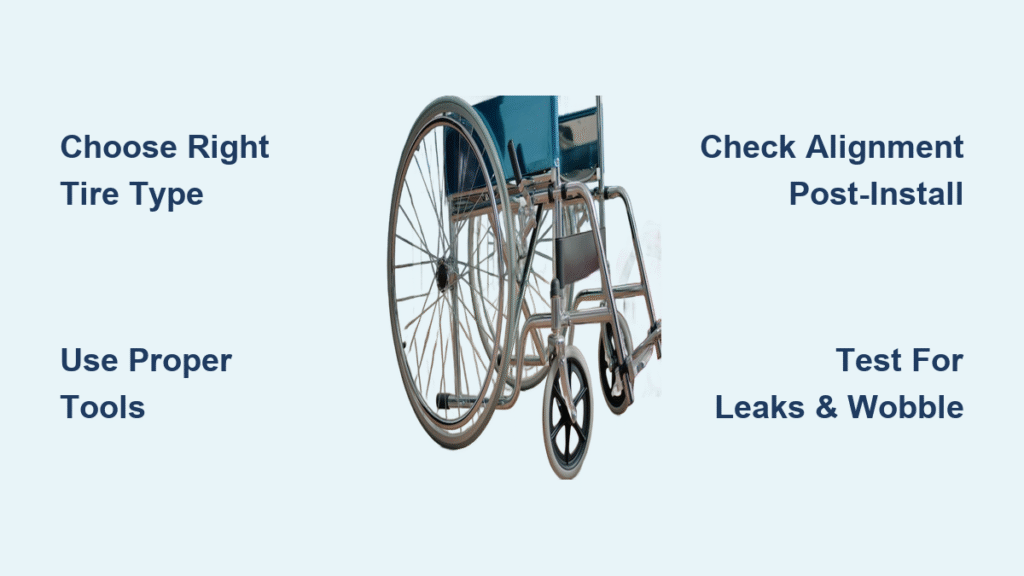
Choose the Right Replacement Wheelchair Tires for Your Lifestyle
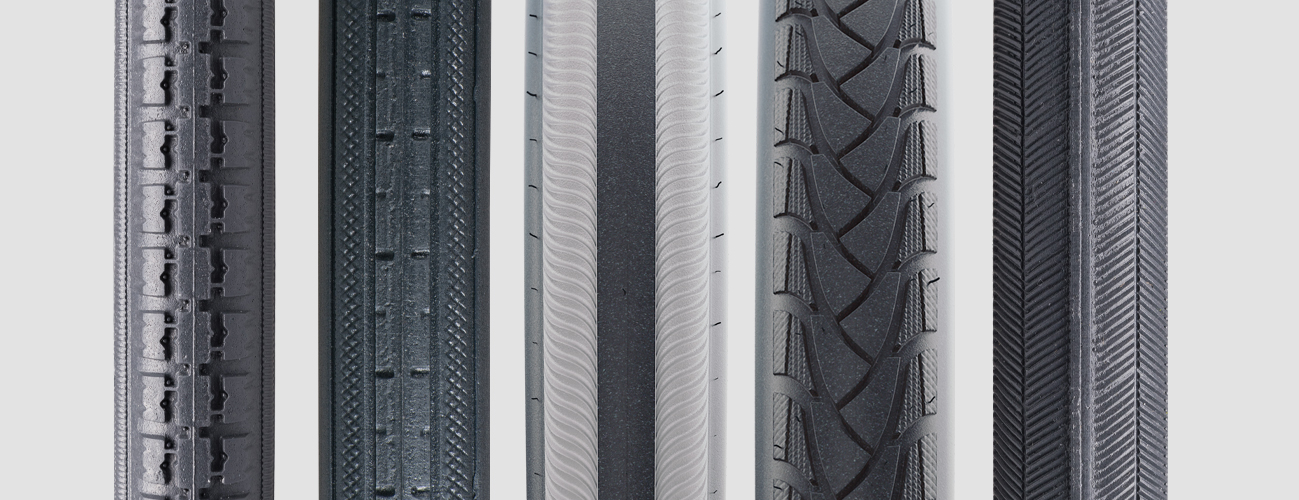
Match Tire Type to Your Daily Terrain and Usage Patterns
Your daily routes determine the ideal tire choice—selecting incorrectly leads to premature wear and unnecessary maintenance. If you primarily navigate smooth indoor surfaces with occasional sidewalk trips, solid tires offer maintenance-free reliability with minimal rolling resistance. For users who frequently encounter rough outdoor terrain, gravel paths, or uneven surfaces, pneumatic tires provide essential shock absorption that reduces upper body strain during extended use. Power wheelchair users spending significant time outdoors should consider flat-free pneumatic options that balance cushioning with puncture resistance, especially when your chair has suspension designed for these tires.
Weigh the Comfort-Maintenance Trade-Off for Your Situation
Pneumatic tires deliver the smoothest ride quality but require weekly pressure checks and carry puncture risks that could leave you stranded. Solid tires eliminate maintenance concerns but transfer more vibration to your body during extended use, potentially causing fatigue. Flat-free pneumatic tires offer a middle ground with reduced maintenance needs while preserving some cushioning, though they tend to be heavier and more expensive. Consider how much time you can dedicate to maintenance versus how critical ride comfort is for your daily activities—this balance determines which tire type best supports your independence.
Essential Tools and Preparation for Wheelchair Wheel Replacement
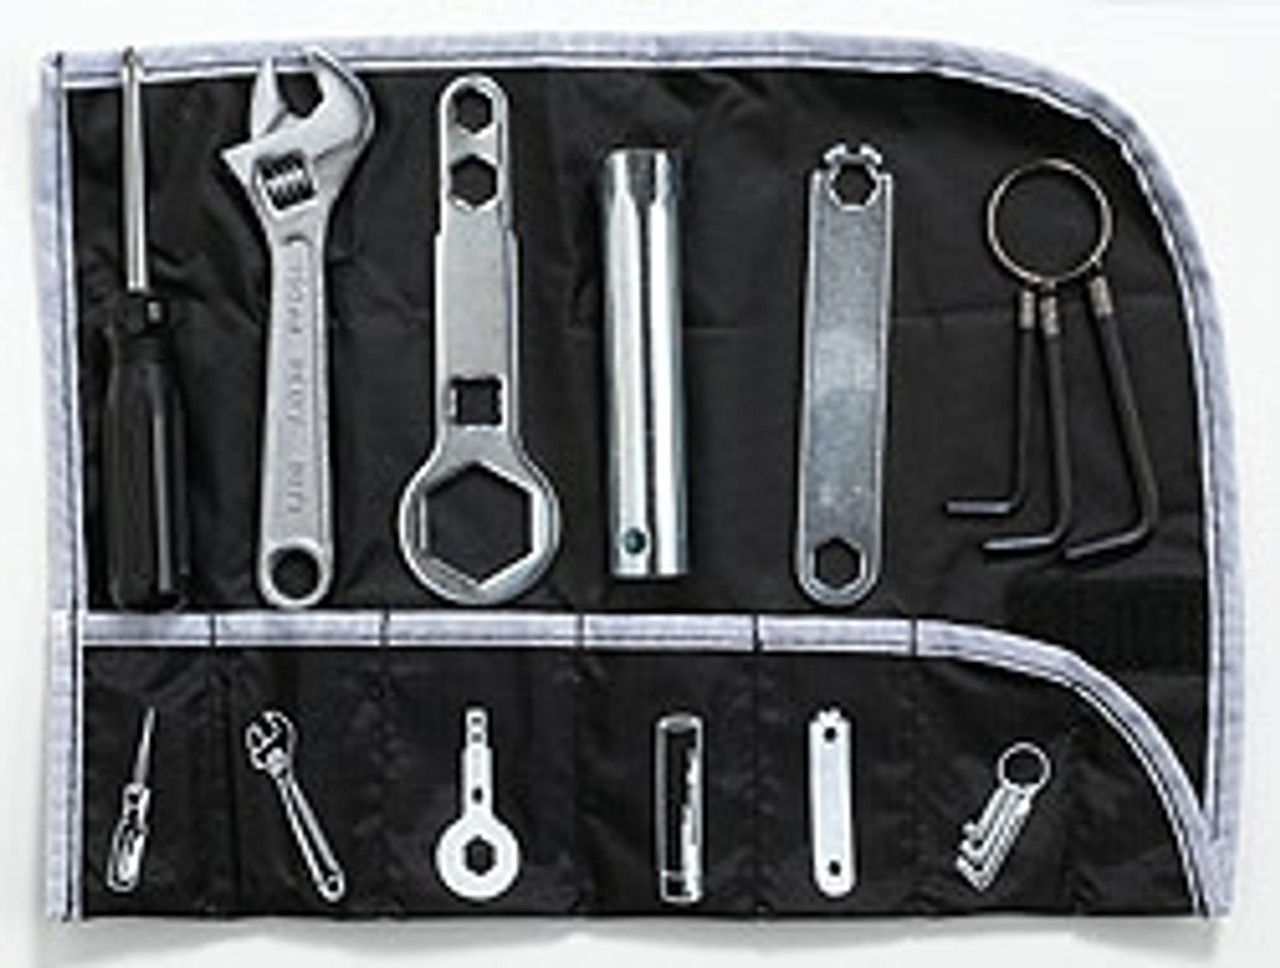
Gather These Specific Tools Before Starting
Avoid frustration mid-replacement by preparing these exact tools: two tire levers designed for wheelchair rims (not automotive versions), an adjustable wrench matching your axle nut size (typically 15-19mm), needle-nose pliers for stubborn tube installations, and silicone-based tire lubricant (never petroleum-based as it degrades rubber). Keep a small container for hardware organization and wear sturdy work gloves to protect your hands from sharp rim edges. Having these specific tools within reach prevents mid-process delays that compromise your workflow.
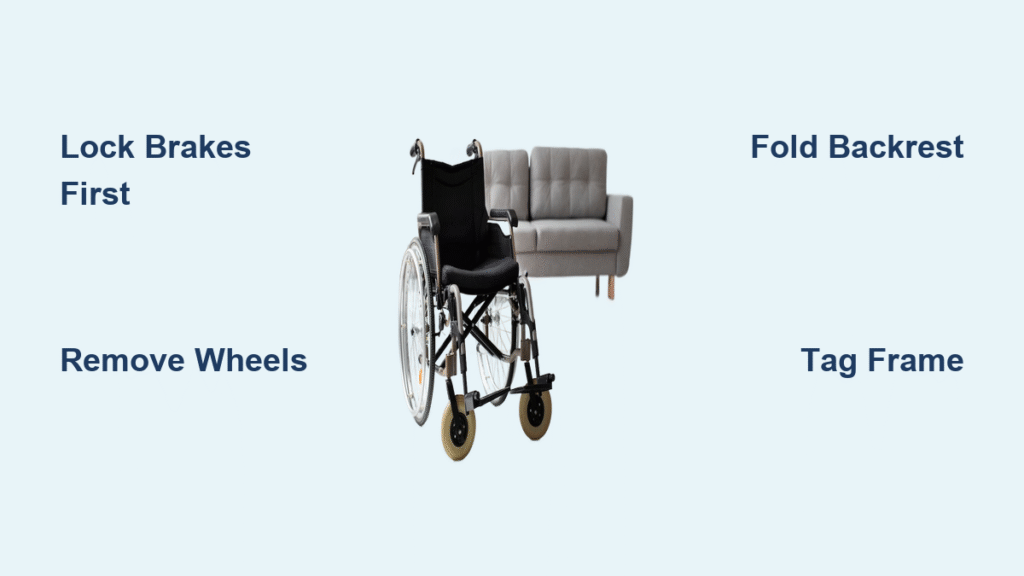
Create an Optimal Workspace for Safe Wheel Replacement
Position your wheelchair on a non-slip surface with both wheel locks fully engaged before beginning. Remove your seat cushion to access rear wheels comfortably and place a towel beneath your workspace to catch small parts. Take clear photos of your wheel assembly from multiple angles before disassembly—these visual references prevent mistakes during reinstallation. Most importantly, work during daylight hours or ensure bright task lighting so you can clearly see critical details like bearing placement and washer orientation that affect final performance.
Remove Drive Wheels Without Damaging Your Chair
Proper Drive Wheel Removal Technique for Different Axle Types
Most manual wheelchairs use either quick-release axles or bolt-on systems requiring specific approaches. For quick-release models, flip the lever to the open position while supporting the wheel’s weight, then pull straight out—never twist the mechanism. Bolt-on wheels require loosening the axle nut counterclockwise while preventing the opposite side from rotating; use a second wrench on the inner nut if present. Always note the exact sequence of spacers and washers as you remove them, placing each on a labeled paper diagram to ensure correct reassembly. This precise documentation prevents alignment issues that cause uneven tire wear after installation.
Caster Wheel Removal Without Damaging Bearings
Tilt your chair carefully onto its side to access the front casters, supporting the frame to prevent tipping. Locate the single axle bolt securing the caster fork—this often requires removing a decorative cap first. Loosen the bolt while holding the caster housing steady, then slide the entire assembly out while watching for small retaining washers that may fall. Inspect the bearings as you remove them; if they feel gritty or don’t spin smoothly, replace them now to avoid future wobbling. Keep the left and right casters separate since many models have different offsets affecting steering performance.
Install New Wheels for Optimal Performance and Safety
Solid Tire Installation Without Specialized Equipment
Begin by thoroughly cleaning the wheel rim with isopropyl alcohol to remove debris and old lubricant residue. Apply silicone-based tire lubricant generously to both the rim edge and tire bead. Start mounting the tire by hand at the valve stem location, working opposite sides toward each other while maintaining even tension. Use tire levers to carefully pull the final sections over the rim, never prying against the valve stem. Rotate the tire fully to ensure complete seating, then spin the wheel to verify it runs true without wobbling before reinstalling.
Pneumatic Tire Setup for Long-Lasting Performance
After mounting the tire loosely on the rim, insert the inner tube with the valve stem aligned to the rim hole. Inflate the tube to approximately 10 PSI just enough to give it shape, then carefully tuck it inside the tire. Complete the tire mounting by working the final sections over the rim, being careful not to pinch the tube. Inflate to the manufacturer’s recommended pressure in stages, checking that the tire seats evenly around the entire rim. Submerge the wheel in water to check for leaks at the valve stem and along the bead before final installation.
Post-Installation Testing and Maintenance Protocol
Critical Safety Checks Before Returning to Daily Use
Never skip these verification steps after wheel installation: First, firmly grip each wheel and attempt to wiggle it side-to-side to confirm axle security. Test brakes on a slight incline to ensure proper engagement with the new wheels. For pneumatic tires, verify pressure with an accurate gauge—not just by feel. Push your chair in a straight line on a smooth surface; significant drifting indicates alignment issues needing correction. Finally, roll over a small obstacle like a threshold to confirm the wheels maintain traction and don’t dislodge.
Establish a Maintenance Routine That Extends Wheel Life
Create simple habits that maximize your new wheels’ performance: Perform a 30-second visual inspection before each use, checking for embedded debris or obvious damage. Clean tires weekly with mild soap and water, especially after outdoor use where road salt or dirt accelerates wear. For pneumatic tires, carry a portable pressure gauge and mini pump—checking pressure takes less than a minute but prevents flats. Monthly, spin each wheel freely while listening for bearing noises that indicate developing problems. These small actions prevent major issues and significantly extend your wheels’ service life.
Troubleshoot Common Wheel Installation Problems Immediately
Fix Wheels That Won’t Seat Properly During Installation
If the tire resists mounting, first verify you have the correct size by comparing rim and tire markings—mismatched dimensions cause impossible installations. Clean both rim and tire bead thoroughly with isopropyl alcohol to remove contaminants preventing proper adhesion. Apply additional silicone lubricant and let it soak for 5 minutes before retrying. For particularly stubborn tires, warm them to room temperature (never with direct heat) as cold rubber becomes less flexible. Work slowly and methodically around the rim rather than forcing one section, which often creates new resistance points.
Correct Steering Issues After Wheel Replacement
When your chair pulls to one side after new wheels, first check pneumatic tire pressures with an accurate gauge—just 2-3 PSI difference creates noticeable drift. Verify both wheels are mounted with identical orientation (some have directional treads). Inspect caster alignment by measuring the distance between front and rear wheel contact points on each side. If problems persist, slightly loosen the caster mounting bolts, push the chair forward firmly to let components settle naturally, then retighten while maintaining straight tracking. This simple adjustment often resolves steering inconsistencies caused by minor installation variances.
Changing wheelchair wheels yourself puts you in control of your mobility. With the right tools, quality replacement tires, and systematic approach, you can maintain peak performance without waiting for service appointments. Remember that practice makes perfect—your second tire change will be significantly faster than your first. Keep this guide handy for future reference, and you’ll never be sidelined by worn or damaged wheels again.