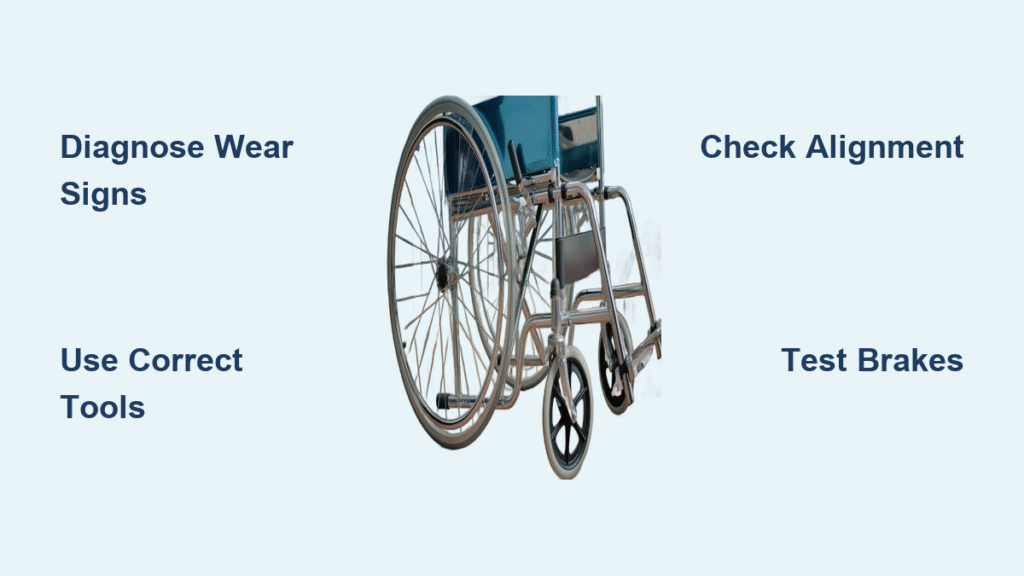
Your wheelchair wheels have carried you through countless journeys, but now they’re showing critical signs of wear—bald tires compromising traction, wobbling casters making turns unpredictable, or that unsettling screech signaling imminent failure. Knowing how to change wheelchair wheels isn’t just routine maintenance; it’s essential for preserving your mobility independence and safety. Whether you’re replacing worn components for daily reliability or upgrading for better terrain performance, this guide delivers the precise steps to confidently replace both front casters and rear drive wheels. You’ll learn to diagnose replacement needs accurately, select compatible parts, and execute installations that restore smooth, safe operation—keeping you moving without disruption.
Diagnose Wheel Replacement Needs Accurately
Front Caster Warning Signs vs Repairable Issues
Don’t replace your entire front caster assembly prematurely—many issues require only component-level fixes. Replace front casters only when you observe persistent wobbling during spins, complete failure to rotate freely, or tires worn beyond safe usability limits. However, a flat tire simply needs replacement rather than full caster substitution, while screeching noises often indicate dirty bearings that require cleaning or bearing replacement alone. Before assuming replacement is necessary, inspect for hair and debris buildup around the caster fork that restricts movement—this common issue resolves with thorough cleaning using a brush and degreaser.
Rear Wheel Failure Indicators You Can’t Ignore
Rear wheel replacement demands careful assessment to avoid unnecessary work. Full rear wheel replacement becomes essential when tire wear compromises safety or structural damage affects the hub assembly. Yet many problems stem from simpler causes: flat tires often just need inflation or patching, screeching noises typically point to failing hub bearings, and tracking issues frequently result from bent spokes rather than wheel failure. For quick-release models, verify whether spindle damage—not the wheel itself—is causing installation difficulties. Always confirm the root cause before proceeding to replacement.
Gather Essential Replacement Tools and Parts
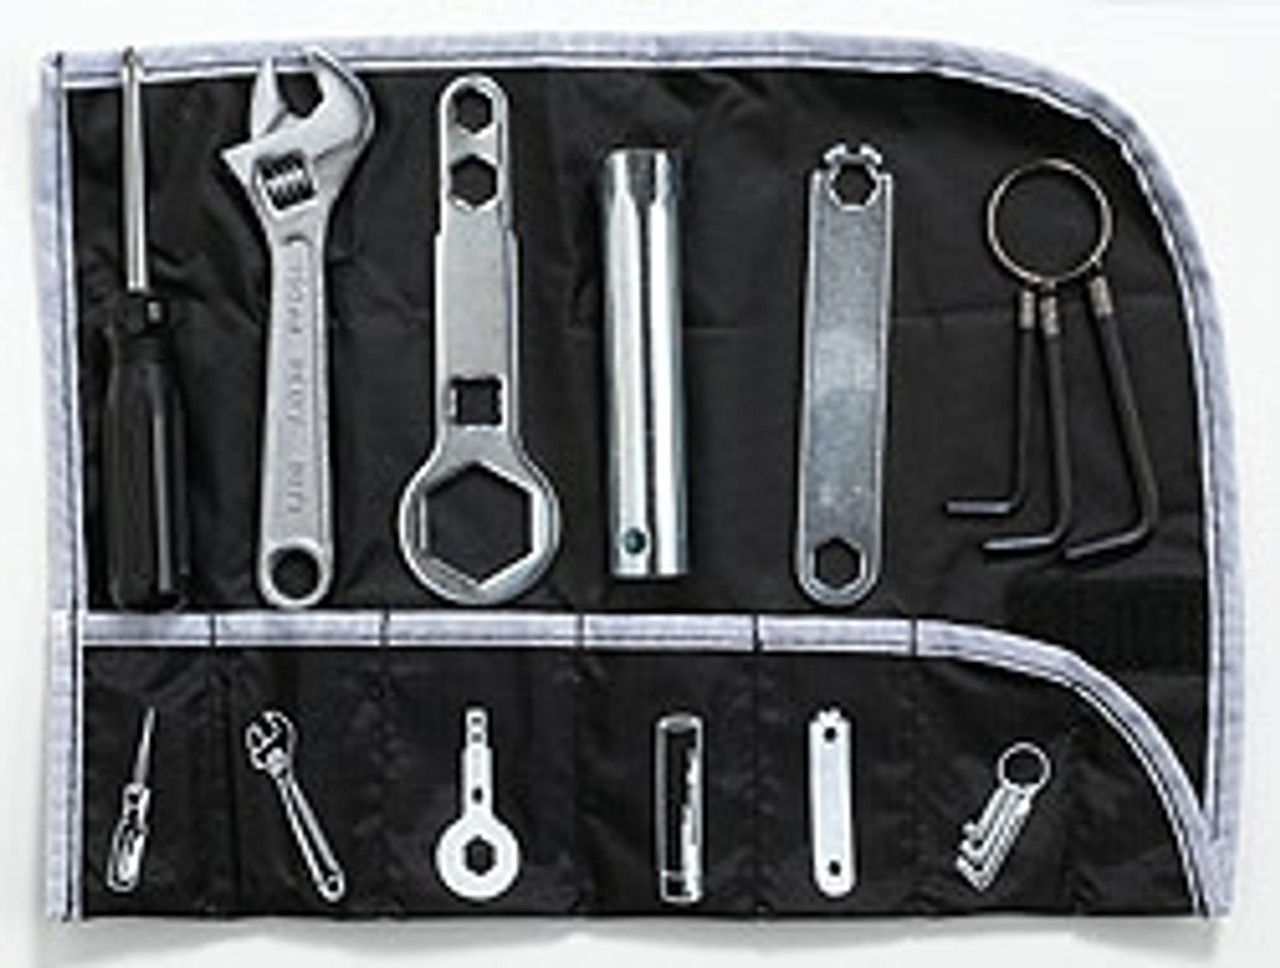
Your toolkit must match your wheelchair’s specific design. For front casters and bolt-attached rear wheels, collect properly sized wrenches and sockets—usually 10-15mm sets—that fit your model’s hardware. Quick-release systems eliminate tools but require spindle verification. Crucially, always source official manufacturer parts rather than generic alternatives; incompatible casters or wheels create dangerous instability. Measure your existing components precisely: hub width, bearing diameter, and tire dimensions must match replacement parts exactly. Store small hardware in labeled containers during disassembly to prevent loss—this simple step avoids frustrating delays.
Replace Front Caster Wheels Efficiently
Remove Worn Casters Without Damage
Position your wheelchair on level ground with brakes fully engaged. Locate the caster bolt securing the assembly to the fork. Place one wrench on the bolt head and another on the nut—this prevents internal components from spinning. Apply steady counterclockwise pressure (remember “lefty loosey”) until the bolt loosens. Remove the bolt completely, catching the washer as it releases. Critical warning: Never hammer on casters to dislodge them—this damages the fork mounting points. If resistance occurs, recheck tool positioning; forced removal often bends critical components requiring professional repair.
Install New Casters for Smooth Steering
Slide the replacement bolt through the caster fork first, then position the new wheel assembly. Add the washer and secure with the nut, tightening just until snug—not fully torqued. Test rotation immediately: the caster should spin freely without wobble or binding. If movement feels restricted, back off the nut slightly; overtightening creates dangerous steering resistance. Pro tip: Apply a drop of light lubricant to the caster bearings before installation—this extends component life and ensures silent, smooth operation. Verify alignment by rolling the chair backward and forward; wheels should track straight without veering.
Change Rear Drive Wheels Correctly
Quick-Release Wheel Replacement Method
Modern wheelchairs feature push-button spindles at the wheel center. Press the release button firmly while pulling the wheel straight outward—never at an angle. The wheel should detach cleanly with minimal force. If resistance occurs, check that your finger fully depresses the button and that you’re pulling parallel to the ground. Before installing the new wheel, inspect the spindle for bends or damage; these interchangeble components can be replaced separately if compromised. To reinstall, align the spindle hole with the frame attachment point and push firmly until you hear a distinct click confirming secure engagement.
Bolt-Attached Rear Wheel Installation Process
For traditional wheelchairs, position wrenches on both sides of the axle nut. Loosen nuts counterclockwise while stabilizing the opposite side to prevent spindle rotation. Remove all hardware systematically, noting washer placement for reassembly. Lift the wheel straight off the axle. During installation, position the new wheel precisely over the axle, then thread bolts through mounting points. Tighten in a star pattern—like car wheels—to distribute pressure evenly across the hub. Final torque should allow free rotation without lateral play; test by spinning the wheel vigorously before lowering the chair.
Select Optimal Tire Types for Your Needs
Pneumatic vs Solid Tire Performance Trade-offs
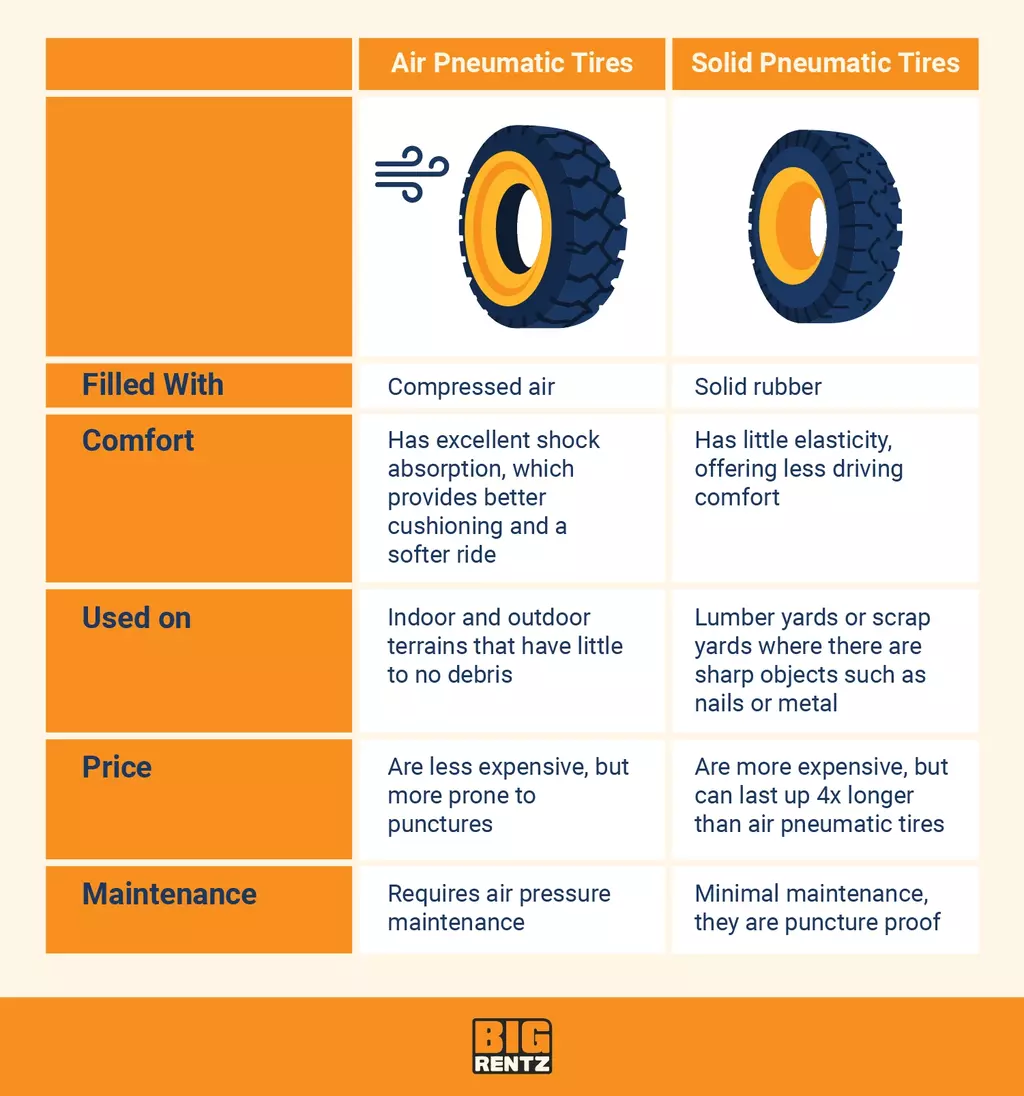
Pneumatic tires deliver superior comfort with their air-cushioned design, absorbing shocks on uneven surfaces while reducing propulsion effort. However, they demand weekly pressure checks and puncture repairs—making them ideal for users prioritizing ride quality who can manage maintenance. Solid tires eliminate air pressure concerns entirely, offering worry-free reliability for daily commuters. Their firmer ride increases vibration transfer but provides unmatched durability for high-mileage users. Flat-free pneumatic alternatives bridge this gap with foam-filled cores that mimic air suspension without maintenance—perfect for power wheelchair users with integrated shock systems.
Verify Safety After Wheel Installation
Critical Post-Replacement Checks
Immediately test brake functionality by engaging locks multiple times—wheels must stop instantly without slippage. Check alignment by rolling the chair 10 feet on a flat surface; it should track straight without drifting. Physically verify attachment security by grasping each wheel and attempting lateral movement—quick-release wheels shouldn’t wiggle, and bolted wheels must show zero play. For rear wheels, spin each vigorously to confirm smooth rotation without grinding noises that indicate bearing issues. Never skip these checks; improperly installed wheels risk sudden failure during use.
Break-In Period Monitoring Protocol
During your first three outings, listen for abnormal sounds like clicking or scraping that suggest misalignment. Feel for vibrations through the handrims that could indicate unbalanced wheels. Watch tire contact points for uneven wear patterns after short trips. Minor adjustments to caster bolt tightness or spoke tension often resolve initial issues as components settle. After 24 hours of use, recheck all fasteners—vibration can loosen nuts even when initially torqued correctly. Document any concerns for future reference during maintenance cycles.
Optimize Wheel Performance for Your Lifestyle
Terrain-Specific Wheel Selection Strategies
Urban commuters maximize maneuverability with smaller-diameter casters (5-6 inches) featuring hard rubber compounds that pivot smoothly on pavement. Outdoor adventurers require larger rear wheels (24+ inches) with soft urethane tires that absorb trail impacts and maintain traction on gravel. Sports wheelchair users need application-specific tires: high-pressure options for basketball courts, deep-tread patterns for tennis, and reinforced sidewalls for rugby. Never compromise terrain needs for aesthetics—mismatched tires directly impact safety and propulsion efficiency.
User-Specific Maintenance Planning
Heavy daily users (over 10 miles/day) should inspect tires weekly and replace casters every 6-12 months, while occasional users may extend intervals to 2-3 years. Users over 250 lbs require reinforced wheels with double-stitched tires to prevent premature wear. If you lack mechanical confidence, choose solid tires despite their firmer ride—they eliminate pressure checks and puncture repairs. Schedule replacements during dry weather when surfaces won’t compromise installation stability. Always keep spare inner tubes and tire levers accessible for pneumatic tire emergencies.
Final Note: Mastering how to change wheelchair wheels transforms a potentially disruptive maintenance task into an empowering act of self-reliance. By accurately diagnosing replacement needs, selecting terrain-appropriate components, and following precise installation protocols, you maintain the mobility freedom your wheelchair provides. Remember that properly maintained wheels directly impact your safety, energy efficiency, and daily independence—this isn’t just equipment upkeep, but an investment in your continued autonomy. When in doubt about compatibility or installation, consult your wheelchair manufacturer’s technical support before proceeding; your safe mobility depends on it.