Nothing disrupts your independence faster than wheelchair wheels that won’t roll smoothly. When your caster starts wobbling, your drive wheels begin squeaking, or you face a flat tire mid-journey, knowing how to change wheelchair wheels yourself becomes essential. This skill keeps you mobile without waiting for repair appointments or relying on others. Whether you use a manual or power wheelchair, replacing wheels is simpler than you think—and this guide shows you exactly how to do it safely and efficiently.
Most wheelchair users experience wheel issues within the first year of ownership, yet many don’t realize they can handle basic wheel replacements themselves. By mastering these straightforward procedures, you’ll save time, money, and most importantly, maintain your autonomy. This guide covers both front caster and rear drive wheel replacement for all common attachment systems, helping you identify when replacement is truly needed versus when simple cleaning will suffice.
Spotting Wheel Problems That Actually Need Replacement
Before grabbing tools, determine whether your wheels genuinely need replacement or just maintenance. Many users replace wheels unnecessarily when a quick cleaning would solve the problem.
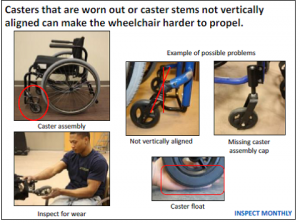
Front Caster Wheel Warning Signs
Skip replacement when:
– Hair and debris wrap around the axle (the most common issue)
– Dirt buildup restricts smooth rotation (easily cleaned)
– Screeching sounds occur (usually bearing-related, not wheel replacement)
– Chair pulls to one side (bent caster forks may be the culprit)
Replace immediately when:
– Tire shows visible wear patterns or chunking
– Caster wobbles during free spinning
– Wheel refuses to spin freely during normal use
– Bearings feel gritty or make grinding noises
Pro tip: Always clean caster axles with tweezers or small scissors before purchasing new wheels. This simple step saves $30-50 per caster and takes less than five minutes.
Rear Drive Wheel Replacement Indicators
Don’t replace the entire assembly when:
– Only the tire is flat or worn (tire-only replacement suffices)
– Screeching noise comes from wheel or hub (bearings likely need attention)
– Chair doesn’t roll straight (bent spokes may cause misalignment)
Full replacement required when:
– Tire tread wears below 1/16 inch
– Spokes show visible damage or bending
– Hub bearings feel rough during rotation
– Wheel wobbles when spun freely
Essential Tools for Changing Wheelchair Wheels
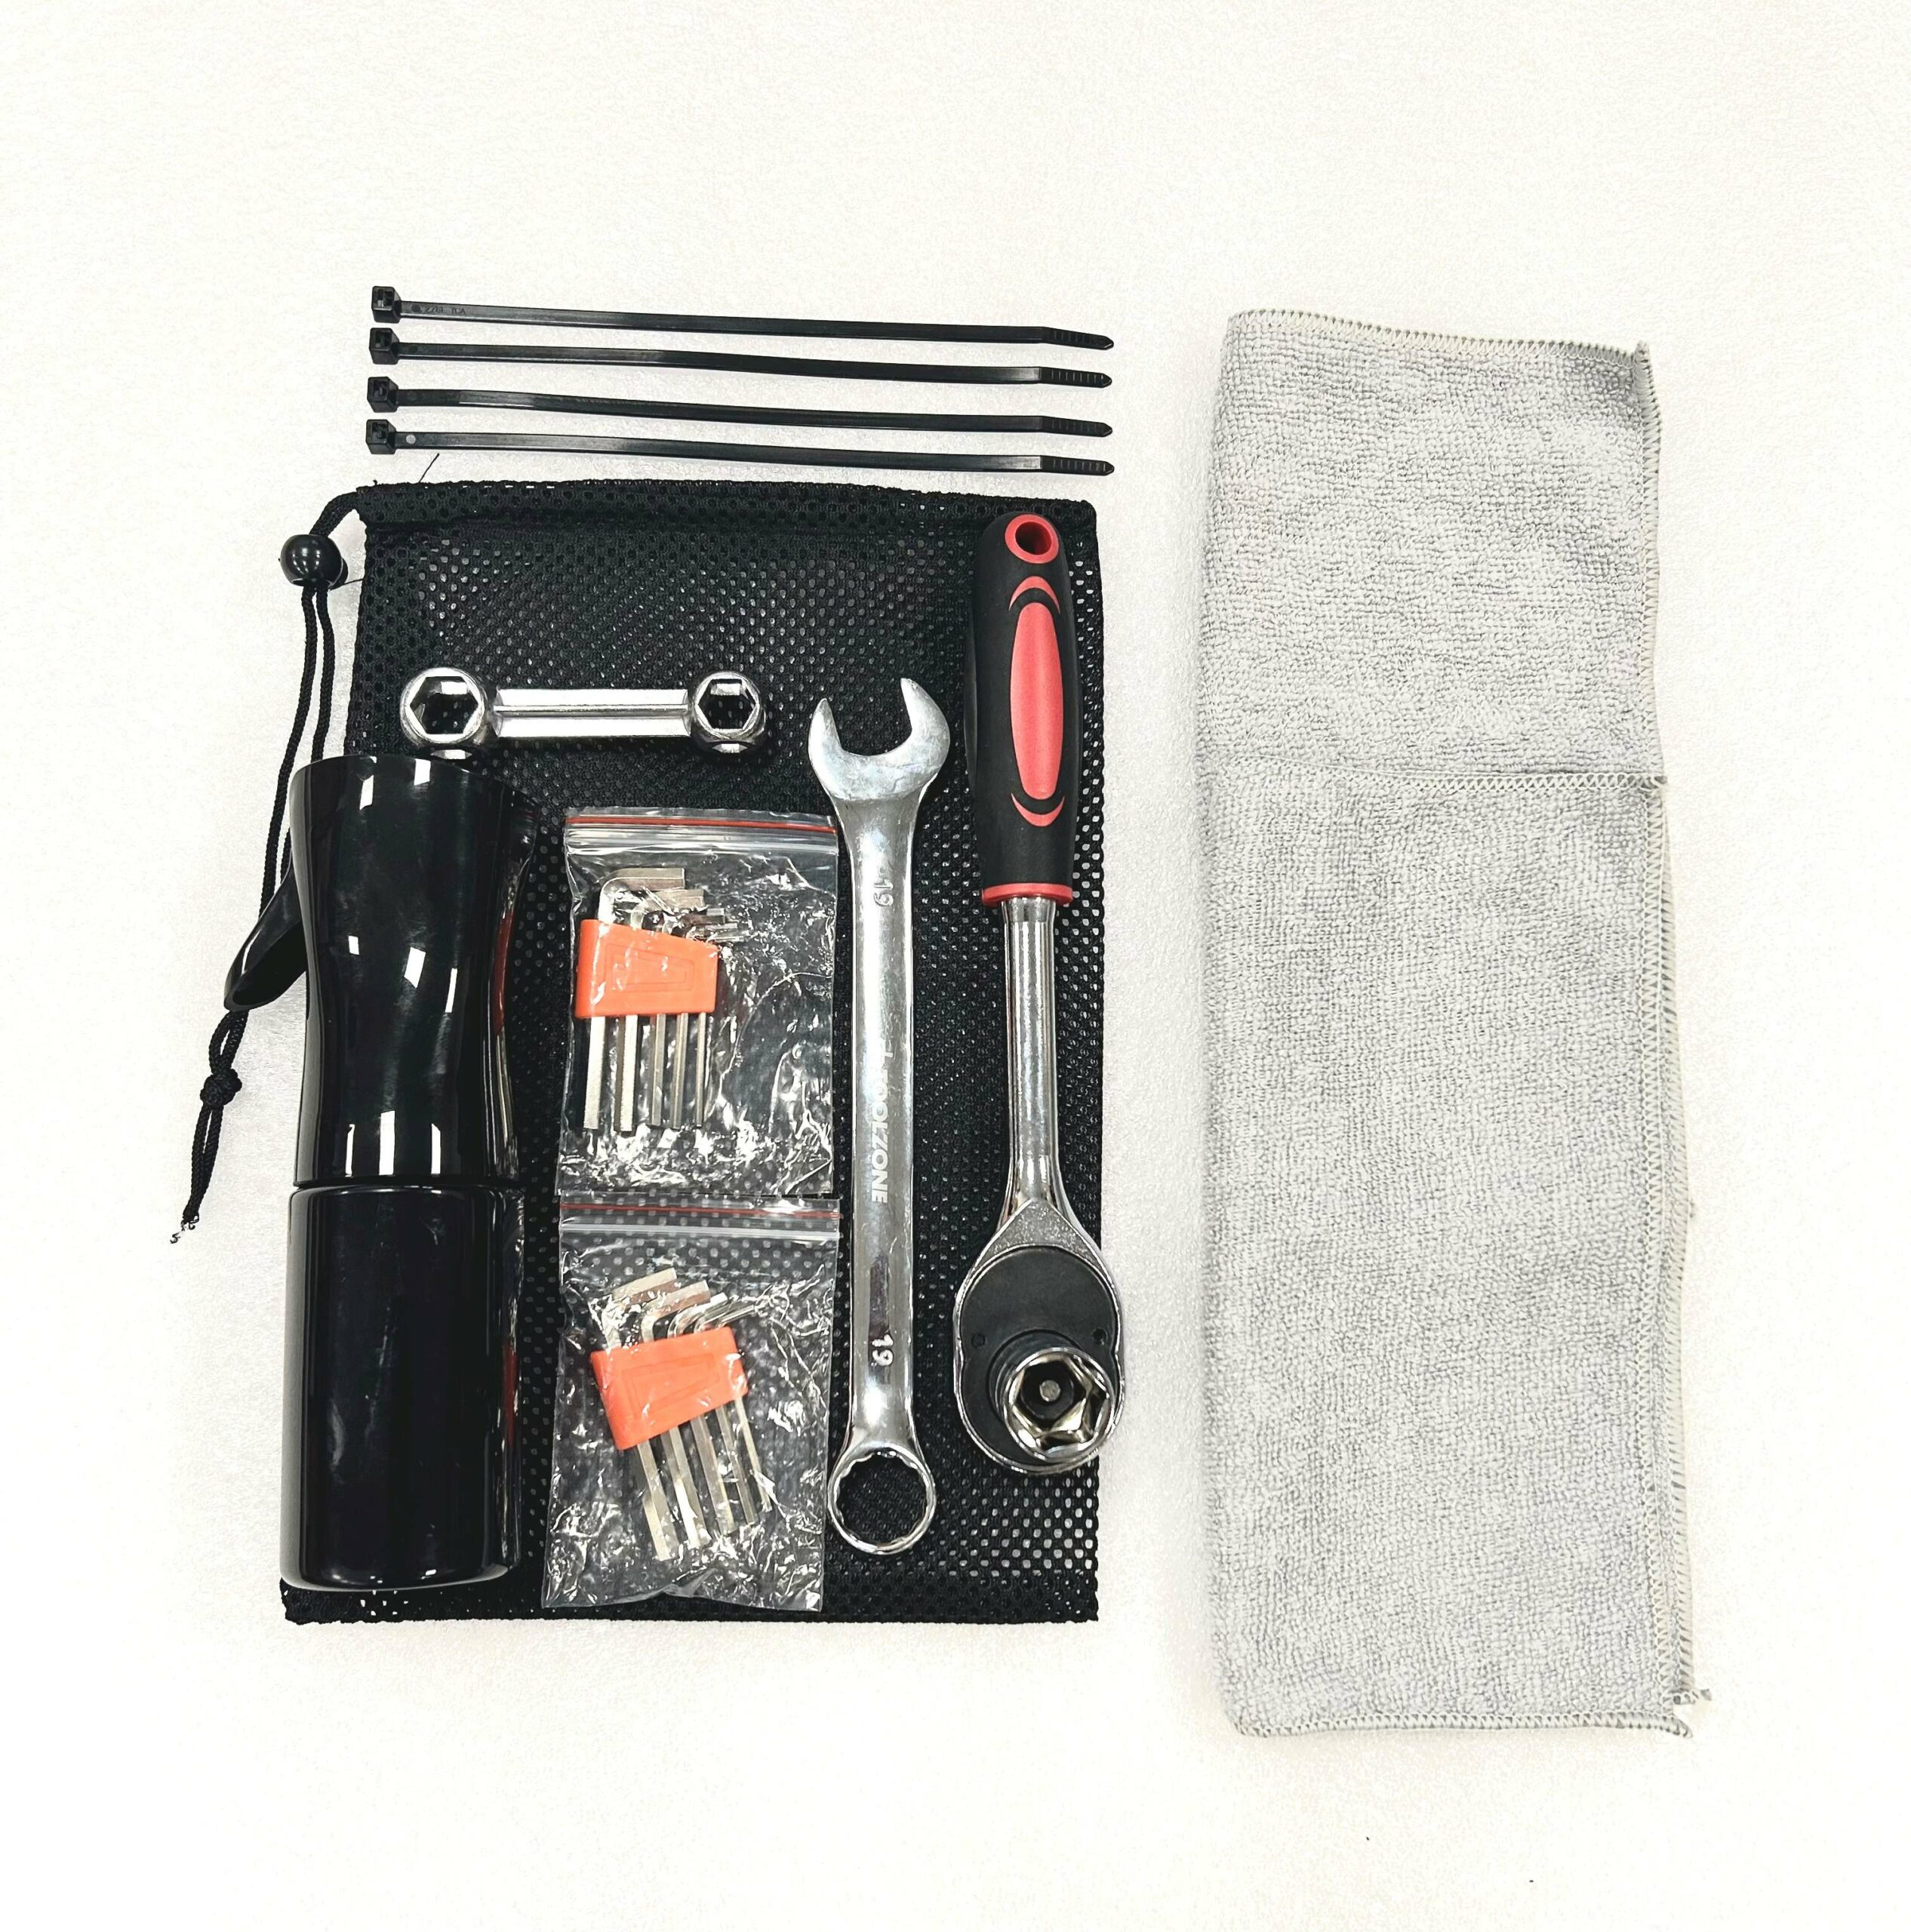
Your toolkit depends on your wheelchair’s attachment system. Most users need only basic items for successful wheel replacement.
Basic Tool Requirements
- For quick-release wheels: No tools needed—just your hands
- For bolt-attached wheels: Properly fitting wrench and socket (or two wrenches)
- Universal needs: Clean rag, small brush for debris removal
Critical warning: Never force components. If resistance feels unusual, stop and reassess—forcing parts can damage your wheelchair frame.
Part Selection Guidelines
Always purchase official manufacturer parts matching your wheelchair model. Off-market wheels compromise safety and performance. Verify these specifications:
– Caster wheels: Hub width, bearing inside diameter, overall height
– Rear wheels: Axle size, spoke count, rim width
– Tires: Width compatibility with rims, valve type (Schrader vs. Presta)
How to Replace Front Caster Wheels
Front caster replacement follows a consistent process regardless of wheelchair model, but requires attention to detail.
Front Caster Removal Process
- Position tools: Place wrench on both sides of the caster bolt
- Loosen correctly: Remember “lefty loosey” for standard threading
- Remove components: Take off bolt, washer, and old caster
- Store safely: Keep all hardware together in a small container
Pro tip: Place a towel underneath during removal to catch any small parts that might fall.
Front Caster Installation Steps
- Insert bolt: Thread through the caster fork from the correct side
- Position new wheel: Ensure bearings face the right direction
- Add washer: This prevents binding during rotation
- Tighten securely: Snug but not over-tightened—should spin freely
- Test rotation: Wheel should spin 3-5 full rotations with a gentle push
Warning: Don’t lose the washers—they’re essential for proper spacing and smooth operation.
Changing Rear Drive Wheels: Two Attachment Systems
Rear wheel replacement differs based on your attachment system. Most modern wheelchairs use one of two common designs.
Quick-Release Wheel Replacement
- Locate the button: Center of the wheel hub
- Press firmly: This activates the release mechanism
- Pull straight out: Wheel should slide off easily (no angling)
- Align new wheel: Match spindle with frame mounting hole
- Push firmly: Until you hear/feel the click engagement
Pro tip: If the wheel won’t release, ensure you’re pulling straight out, not at an angle. The mechanism needs linear force to disengage properly.
Bolt-Attached Wheel Replacement
- Tool positioning: Place wrench on both sides of the axle
- Bolt direction: Standard threading—left to loosen
- Support the wheel: Prevent dropping once bolts release
- Position new wheel: Align axle with frame mounting points
- Tighten evenly: Alternate sides to maintain alignment
- Final check: Ensure wheel spins freely without wobble
Choosing the Right Replacement Tires

Your tire choice significantly impacts mobility, comfort, and maintenance frequency.
Pneumatic vs. Solid Tire Comparison
Pneumatic tires (air-filled):
– Pros: Smoother ride, lighter weight, better shock absorption
– Cons: Require maintenance, prone to punctures
– Best for: Daily users, outdoor navigation, comfort priority
Solid tires (maintenance-free):
– Pros: Never go flat, zero maintenance, puncture-proof
– Cons: Firmer ride, heavier, harder to install
– Best for: Indoor use, users who prioritize reliability
Pro tip: Mark your calendar with replacement dates. Wheelchair tires typically last 6-12 months with daily use, depending on terrain and user weight.
Post-Installation Safety Verification
Never skip this critical step after changing wheelchair wheels—your safety depends on proper installation.
Essential Safety Checks
- Spin test: Each wheel should rotate freely without wobble
- Brake check: Ensure brakes engage properly on new wheels
- Alignment verification: Chair should roll straight without pulling
- Hardware confirmation: All bolts tight, quick-release properly seated
Maintenance Schedule for Longevity
- Weekly: Visual inspection for debris or damage
- Monthly: Check tire pressure (pneumatic tires)
- Quarterly: Deep clean wheels and inspect bearings
- Annually: Replace worn tires before they fail
Troubleshooting Common Wheel Replacement Issues
Even with careful installation, problems can arise. Here’s how to address them quickly.
Wheel Won’t Release Properly
- Quick-release: Press button harder while pulling straight out
- Bolt-attached: Apply penetrating oil for seized bolts, ensure correct wrench size
Wheel Wobbles After Installation
- Check for proper seating in frame
- Verify all hardware is present and correctly installed
- Inspect for bent rim or damaged bearings
Chair Pulls to One Side
- Ensure both wheels match (same type and wear level)
- Check caster alignment and fork condition
- Verify tire pressure matches both sides (pneumatic tires)
Mastering how to change wheelchair wheels transforms you from a passive user into an empowered mobility expert. Properly maintained wheels directly impact your daily independence, reducing the physical effort needed for propulsion and preventing unexpected failures that could leave you stranded. Keep a basic toolkit and spare caster wheels handy, and you’ll handle most wheel issues in under 30 minutes—no professional help required. When in doubt about complex issues like frame damage or unusual resistance, consult a professional to ensure both safety and optimal performance. Your wheels are your freedom—treat them right, and they’ll keep you moving wherever life takes you.