
Your wheelchair seat height silently controls your daily independence—too low and transfers become dangerous struggles, too high and footrests scrape every doorway. When John’s new foam cushion compressed after three months, his footrests started dragging on carpet, forcing exhausting detours around his home. This isn’t just about comfort; improper seat height causes 34% of pressure injuries according to clinical studies. Whether you’re self-propelling or using power mobility, knowing how to adjust wheelchair seat height correctly prevents falls, improves posture, and unlocks smoother transfers. In this guide, you’ll master precise measurement techniques, identify your specific adjustment system, and fix common height-related problems with actionable steps verified by seating specialists.
Measure Your Exact Seat Height Before Adjusting
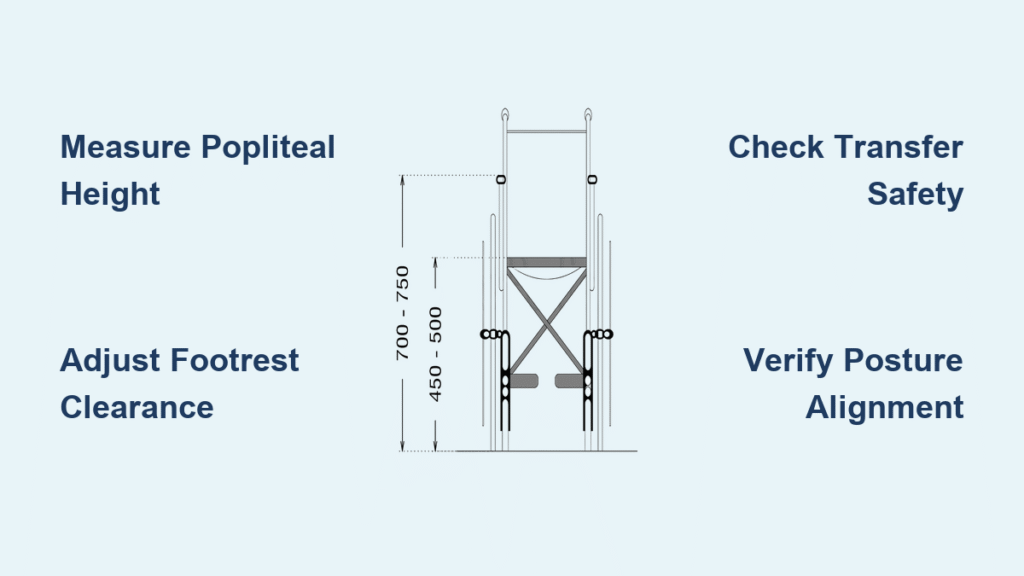
Guessing seat height leads to painful compromises between transfer safety and foot positioning. Skip generic height charts—your body’s unique proportions demand personalized measurement. Grab a tape measure and firm chair; this five-minute assessment prevents months of discomfort.
Pinpoint Your Ideal Height Using Clinical Methods
For standard footrest users:
Sit on a hard chair with feet flat and knees at 90 degrees. Measure from floor to the back of your knee (popliteal fossa). This number equals your wheelchair seat height before adding cushion thickness. If you wear thick-soled shoes daily, add 0.75 inches to this measurement.
For foot-propelled chairs:
Subtract 2-3 inches from your popliteal measurement. This creates the slight knee bend (95-110 degrees) needed for effective ground contact. Test this by attempting propulsion on your usual surfaces—if your heels lift off the ground, raise the seat by 0.5-inch increments.
Critical cushion adjustment:
Foam cushions compress 0.5-1 inch under weight. Air/fluid cushions lose 1-2 inches. Measure your compressed cushion thickness while seated, then deduct this from your popliteal measurement. Recheck monthly as cushions degrade.
Avoid Clearance Disasters with Real-World Testing
Minimum 3-4 inches of footrest clearance prevents constant scraping. Test this by rolling over your home’s thickest carpet and highest door thresholds. Check clearance at three critical points:
– When leaning forward to propel
– During sharp turns on ramps
– While backing up from tight spaces
If footrests tap the ground during any test, your seat height is too low. Conversely, if your thighs press against the seat front edge during transfers, the seat is dangerously high.
Identify Your Wheelchair’s Adjustment System
Forcing adjustments on the wrong mechanism can damage your chair. Match your wheelchair to these common systems before touching any tools.
Pin-Release Systems (Most Manual Chairs)
Rear wheel height adjustment:
1. Locate spring-loaded pins on both wheel forks
2. Support chair weight with brakes engaged or an assistant
3. Pull pins outward while sliding wheels up/down
4. Align with numbered holes (each hole = 0.5-1 inch change)
5. Release until pins click fully into place
6. Test stability by pressing down firmly on the seat
Critical mistake: Adjusting only one side causes uneven rolling. Always match hole numbers on both forks. Worn pins that don’t click indicate replacement is needed.
Threaded Caster Stem Systems
Front height modification:
1. Find the locking nut where front casters meet the frame
2. Loosen nut with 14-16mm wrench (don’t remove completely)
3. Turn stem clockwise to raise, counterclockwise to lower
4. Tighten nut securely—hand-tight plus 1/4 turn
5. Repeat identically on all casters to maintain level positioning
Pro tip: Mark your original height with tape before adjusting. If stems feel loose after tightening, threads are stripped—stop adjusting and consult a technician.
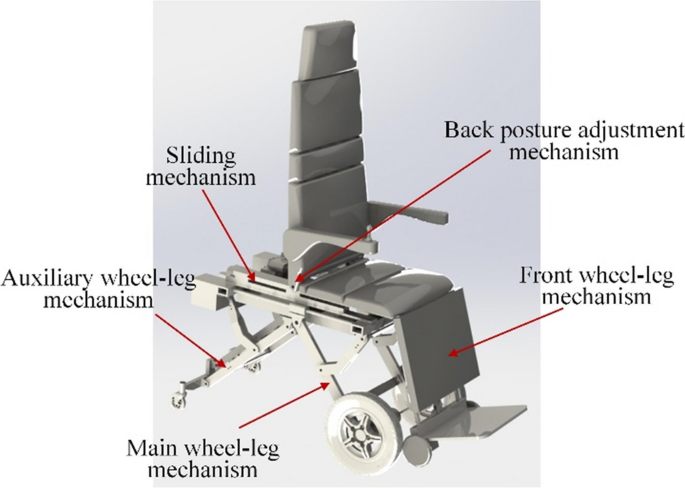
Power Wheelchair Elevation Systems
Electronic height controls:
– Use joystick menu or dedicated height button
– Adjust in 0.5-inch increments for precision
– Heed stability warnings at maximum height (usually 6-12 inches above base)
– Some models auto-lock above 8 inches for safety
Hydraulic pump troubleshooting:
– Pump handle raises seat gradually; red lever lowers it
– Uneven movement indicates low fluid—check reservoir monthly
– Air bubbles cause jerky motion; bleed system per manufacturer instructions
Warning: Never exceed manufacturer height limits. Power chairs become unstable beyond specified ranges.
Fix Immediate Height Problems Without Tools
When footrests scrape or transfers fail, these field fixes buy time until proper adjustment.
Stop Footrest Dragging in 60 Seconds
If clearance is less than 3 inches:
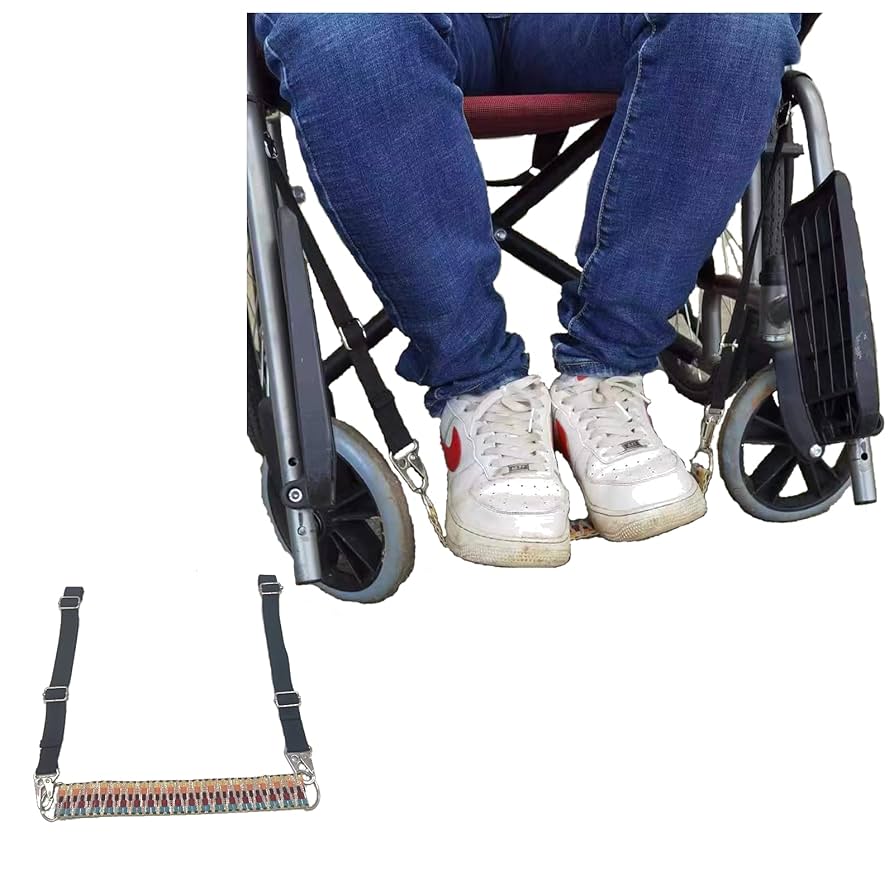
– Fully extend telescoping footrest tubes using quick-release pins
– Flip footplates upward to gain 1-2 inches of clearance
– Place folded towel under seat cushion for temporary lift
Permanent solution sequence:
1. Raise seat 1 inch via rear wheel pins
2. If maximum height reached, replace standard casters with 1-inch smaller wheels
3. Install anti-tip bars for stability above 20 inches seat height
Critical check: After adjustment, verify footrests don’t catch when backing up—this causes 22% of tipping accidents.
Solve Transfer Struggles Instantly
Mismatched heights between wheelchair and transfer surfaces cause 40% of falls. Compare your chair to key surfaces:
– Toilet seat height: Standard 17-19 inches
– Car seat height: Typically 18-21 inches
– Bed height: Usually 20-24 inches
Adjustment strategy:
– For stand-pivot transfers: Set wheelchair 1-2 inches higher than target surface
– For sliding board transfers: Set wheelchair 0.5-1 inch lower
– Use removable 1-inch gel cushions for fine-tuning (+/- 1 inch)
Pro tip: Place a yoga block next to your bed—if transfers improve, your chair needs height adjustment.
Recognize Dangerous Postural Warning Signs
Your body sends clear signals when seat height is wrong. Ignore these, and pressure injuries develop within hours.
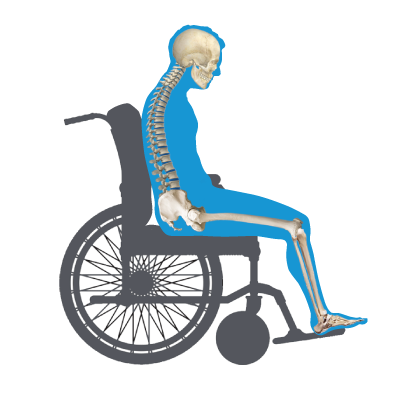
Visual Red Flags Requiring Immediate Action
- Feet dangling without footrest contact → Seat too high (risk: sacral sitting)
- Thighs pressing seat front edge → Seat too low (risk: shear forces)
- Knees above hip level → Excessive height (risk: poor circulation)
- Slouched posture with tailbone lifted → Footrests too high
Expert note: Uneven weight distribution shows as red marks on one buttock—this predicts pressure ulcers within 48 hours.
Functional Warning Signs
- Straining to reach wheels for propulsion
- Footrests catching during 90-degree turns
- Increased effort to clear 1/2-inch thresholds
- Pain behind knees after 20 minutes of sitting
Critical: If transfers that took 10 seconds now require 30, your seat height is unsafe.
Maintain Safe Height Settings Long-Term
Seat height isn’t “set and forget.” Monthly checks prevent slow degradation into dangerous configurations.
Weekly Safety Verification Routine
Height-specific inspection:
– Confirm all adjustment pins are fully engaged (listen for clicks)
– Check for oval-shaped wear in pin holes—replace forks if worn
– Test caster stems for wobble indicating thread damage
– Rock chair side-to-side at seated height—no movement should occur
Measurement protocol:
1. Measure from floor to compressed cushion surface
2. Compare to your original popliteal-based calculation
3. If difference exceeds 0.5 inches, adjust immediately
4. Document measurements in a waterproof log
Cushion reality: Foam loses 0.25 inches per year. Replace cushions when compressed height drops 1+ inch.
Know When to Call a Professional
Seek immediate specialist help if:
– Adjustment mechanisms slip under weight
– You’ve lost 2+ inches of height due to cushion compression
– Leg length changed after surgery or injury
– Weight fluctuations exceed 20 pounds
Reassessment triggers: New wheelchair components, progressive conditions like MS, or frequent transfers to varying-height surfaces (e.g., office vs. home).
Quick Reference for Common Scenarios
Height adjustment cheat sheet:
– 4’10”-5’2″ users: Start at 17 inches (add shoe height)
– Transferring to standard toilet: Chair height = 18-19 inches
– Desk work: Minimum 22-inch clearance under table
– Maximum safe height: 24 inches (without anti-tip bars)
Adjustment time estimates:
– Pin systems: 7 minutes (including stability testing)
– Threaded casters: 12 minutes (leveling critical)
– Power elevation: 45 seconds (with practice)
Warning signs requiring adjustment:
1. Footrests touch ground during threshold crossing
2. Knees rise above hips when seated
3. Transfer time increased by 50%
4. Daily pressure redness on sitting bones
Key takeaway: Proper how to adjust wheelchair seat height execution isn’t mechanical—it’s a daily safety ritual. Measure monthly, verify clearance on your toughest terrain, and never ignore postural warnings. When your seat height aligns with transfer surfaces within 0.5 inches, propulsion becomes effortless, transfers gain confidence, and pressure risks plummet. Bookmark this guide for your next adjustment, but remember: if you’re modifying height more than quarterly, schedule a professional seating evaluation—your skin’s health depends on precision you can’t eyeball. For persistent issues, contact your local wheelchair clinic; most offer free height assessments to prevent costly complications.


