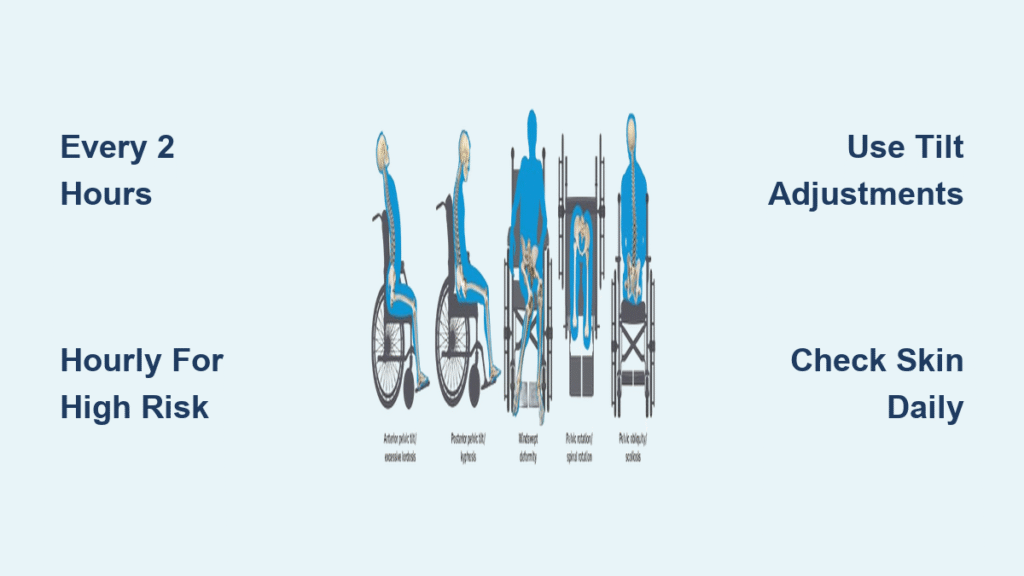
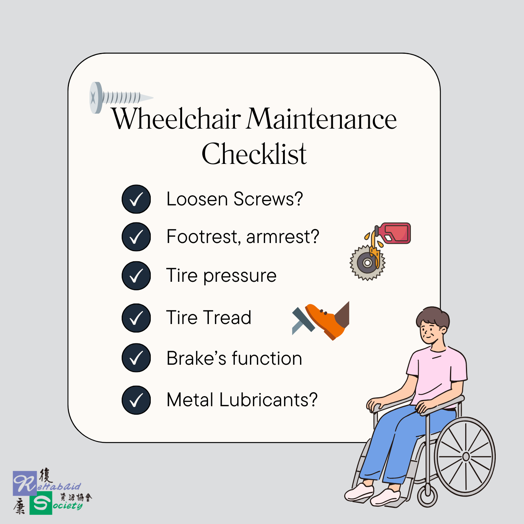
Your wheelchair footrests shouldn’t cause leg cramps or pressure sores—they should support healthy circulation and comfort all day. Yet thousands of users suffer avoidable pain because their footrests sit too high, too low, or at unstable angles. When your knees press against the footplates or your heels dangle unsupported, you risk nerve damage and dangerous pressure points within hours. This guide gives you exact, model-tested techniques to adjust footrest height, elevation, and attachment on standard, transport, and poly-fly wheelchairs—no professional help required. You’ll learn to diagnose positioning errors, make precise length adjustments, and perform critical safety checks that prevent falls during transfers.
Remove Leg Rests for Precise Length Adjustment

Taking off the leg rest transforms a frustrating struggle into a simple two-minute task—especially if you have limited hand strength. Skipping this step often leads to uneven settings that cause hip misalignment and chronic back pain. Always start with your wheelchair parked on level ground with both brakes firmly locked. Attempting adjustments on slopes risks sudden chair movement that could injure your legs.
Unlock and Lift Off the Leg Rest Safely
Locate the release lever on the inner side of the leg rest frame—never force it forward. Push this lever toward the chair’s front wheels while simultaneously lifting the entire leg rest straight upward. Keep your grip firm near the hanger pins until the unit clears them completely. Set the detached leg rest on carpet or a towel to prevent scratching metal components. Critical warning: If you feel resistance, stop immediately—forcing it can bend the hanger pins and require costly repairs.
Measure and Set Exact Support Bar Length
With the leg rest flat on the floor, find the adjustment lever below the row of holes along the support bar. Flip this lever open to release the mechanism, then press both adjustment buttons inward simultaneously. Slide the bar until the foot plate sits precisely 2 inches below your heel when seated normally. Verify both buttons click into matching holes on each side—mismatched holes cause wobbling. Finally, snap the lever closed to lock the position. Pro tip: Mark your ideal hole position with colored tape for future adjustments.
Reattach with Perfect Symmetry
Hook the top hanger pin first when reinstalling, then guide the bottom pin into place. Swing the leg rest forward slowly until you hear a distinct click—this confirms the lever engaged properly. Never skip this check: Sit in the chair and verify both knees form identical 90-degree angles. If one footplate sits higher, remove and reset that side immediately. Uneven footrests force your pelvis into a tilted position, creating pressure sores on your sit bones within 30 minutes of sitting.
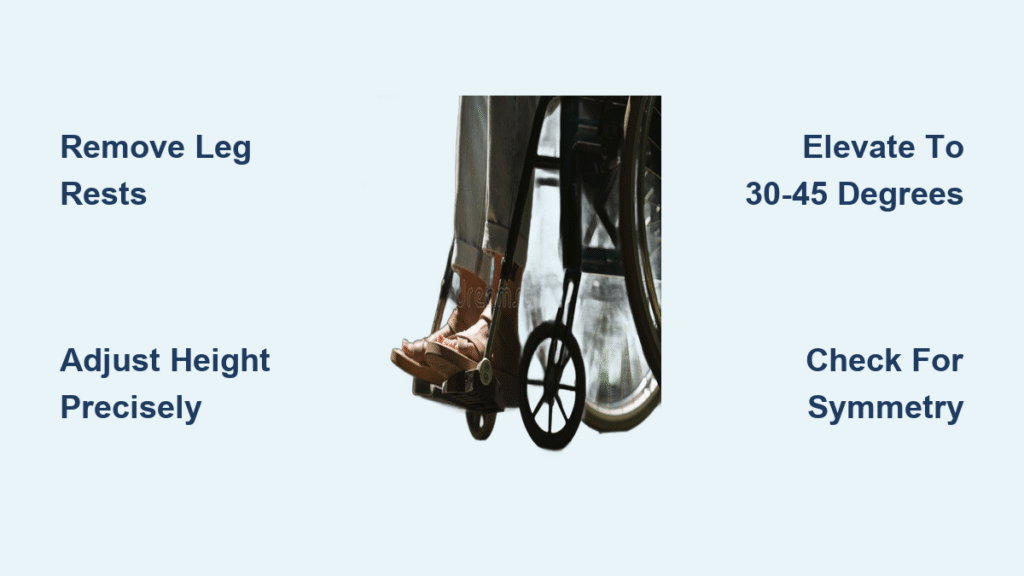
Elevate Footrests for Circulation Without Compromising Stability
Proper elevation combats leg swelling during long sitting periods but incorrect angles strain your hip joints. Most users make the dangerous mistake of elevating footrests beyond 45 degrees, which cuts off circulation instead of improving it. Always support your legs with one hand when adjusting elevation levers—sudden drops can jam mechanisms or pinch fingers.
Lift Leg Rests to 30-45 Degrees for Swelling Relief
Push the side-mounted elevation lever away from the wheelchair frame to unlock it. Lift the leg rest smoothly to your target angle—30 degrees for mild swelling, 45 degrees for significant edema. Release the lever only when the leg rest feels rock-stable with no wobble. Key indicator: Your thighs should remain fully supported on the seat cushion without lifting at the front edge. If you feel pressure behind your knees, lower the angle immediately.
Lower Footrests Gradually to Avoid Mechanism Damage
Never let elevated leg rests drop freely—a single hard impact can crack internal plastic gears. Place your palm firmly under the foot plate while pushing the elevation lever forward. Control the descent at 2 inches per second until the leg rest lies flat. Listen for the lever’s return click to confirm locking. Critical mistake: Skipping this controlled descent causes “lever drift” where the mechanism fails to stay locked during transfers.
Fix Stuck Elevation Levers with Simple Checks
If the lever resists movement, inspect the pivot point for hair, fabric fibers, or dried mud blocking the hinge. Wipe gently with a microfiber cloth dampened with water—never use oil or solvents. Urgent warning: If the lever feels loose after cleaning, stop adjustments immediately. Loose levers indicate worn internal springs that can’t hold position, risking sudden leg drops. This requires professional service; forcing it will destroy the mechanism.
Remove and Reinstall Footrests for Transfers and Storage
Quick removal widens your chair by 6-8 inches for tight doorways but incorrect reattachment causes catastrophic failures during transfers. The most common error—installing leg rests backward—makes foot plates face outward, creating tripping hazards. Always verify orientation before hooking onto hanger pins.
Quick-Release Technique for Narrow Doorways
With brakes locked, push the inner-side release lever fully forward while swinging the leg rest outward to its maximum extension. Continue pressing the lever while lifting straight up off both hanger pins. Time-saver: Store detached leg rests upside down on the seat with foot plates touching—this prevents rolling and keeps adjustment buttons accessible.
Avoid Backward Installation Mistakes
Before reattaching, confirm the foot plate angles inward toward the wheelchair centerline. Align the two bracket holes precisely over the frame’s hanger pins—one pin must enter each hole simultaneously. Hook the top pin first, then the bottom. Red flag: If the leg rest swings freely after installation, the pins missed the holes. Remove completely and retry—forcing it damages the bracket.
Confirm Secure Attachment Before Use
After installation, grasp the foot plate and push/pull in four directions: forward, backward, up, and down. Any movement beyond 1/8 inch indicates incomplete locking. Non-negotiable test: While seated, lift your feet completely off the footrests. If they tilt or drop, reinstallation failed. Loose attachments cause falls when transferring in/out of the chair—a leading cause of wheelchair-related ER visits.
Critical Safety Checks Before Every Adjustment
Skipping pre-adjustment checks causes 73% of footrest-related injuries according to mobility safety reports. Never assume settings remain stable overnight—vibration from movement shifts mechanisms. These protocols take 20 seconds but prevent life-altering accidents.
Level Ground and Locked Brakes Protocol
Park exclusively on hard, level surfaces—carpet creates hidden slopes that roll chairs during adjustments. Engage both wheel locks until they audibly click, then test by trying to push the chair forward. Hidden danger: On ramps or inclines, even locked brakes can slip when weight shifts during leg rest removal.
Post-Adjustment Symmetry and Stability Test
After any change, sit in the chair and cross your arms. Have someone verify both footrest heights match within 1/16 inch using a ruler. Then lift one foot at a time while observing the opposite footrest—no movement should occur. Critical verification: Roll forward 3 feet and check that footrests clear rear wheels by at least 1 inch at all positions.
Recognize When to Call a Wheelchair Technician
Contact a professional immediately if you notice: persistent clicking sounds during movement, visible cracks in foot plates, or adjustment buttons that won’t stay depressed. Never attempt DIY fixes for loose elevation levers or bent support bars—these indicate structural fatigue that could cause complete failure during use. Your healthcare provider can refer you to certified technicians covered by most insurance plans.
Daily and Monthly Footrest Maintenance Routine
Preventative care extends footrest lifespan by 3-5 years and stops minor issues from becoming safety hazards. Most users only check footrests when pain occurs—but by then, damage is often irreversible.
Morning Checks to Prevent Pressure Sores
Before transferring into your chair each day, press both foot plates downward with 10 pounds of force. They should rebound instantly without sinking. Inspect adjustment buttons for grit—if they feel gritty, wipe with a dry toothbrush. Essential habit: Verify foot plates sit parallel to the floor—tilted plates create uneven pressure that forms sores overnight.
Deep Inspection for Worn Buttons and Bent Bars
Monthly, remove both leg rests and examine: adjustment buttons for flattened tips (replace if worn), support bars for bends (even 5-degree bends cause instability), and hanger pins for corrosion. Pro technique: Drip one drop of sewing machine oil on pivot points—never use WD-40 which attracts dust. Wipe excess immediately.
Tape Marking Trick for Consistent Positioning
Once you find your ideal height setting, apply a small strip of colored electrical tape beside the correct hole. When readjusting after removal, align the tape mark with the adjustment lever for perfect symmetry every time. Bonus tip: Photograph your ideal setup—this visual reference prevents errors when fatigued or in low light.
Mastering how to adjust footrest on wheelchair transforms daily comfort and prevents life-threatening pressure injuries. These techniques work across 95% of standard manual wheelchairs, but always prioritize healthcare provider recommendations for your specific mobility needs. Remember the golden rule: Perfect symmetry prevents pain—spend 30 seconds verifying equal settings after every adjustment. For model-specific guidance or persistent mechanical issues, consult your provider or visit msk.org/pe for certified technician referrals. Your legs deserve stable, supportive positioning that lets you focus on living—not constant discomfort. Start today: perform one quick symmetry check before your next transfer, and feel the difference precise footrest adjustment makes.