You’re stranded at the grocery store with your Drive wheelchair stubbornly stuck in the open position, refusing to collapse for car transport. That half-folded frame blocks doorways, won’t fit in trunks, and leaves you wrestling with an awkward metal tangle. Thousands of Drive wheelchair users face this exact frustration monthly—but here’s the good news: 90% of “drive wheelchair won’t fold” failures resolve with simple cleaning or hardware adjustments. This guide delivers immediate solutions for your stuck frame, with proven fixes that restore smooth folding in under 30 minutes.
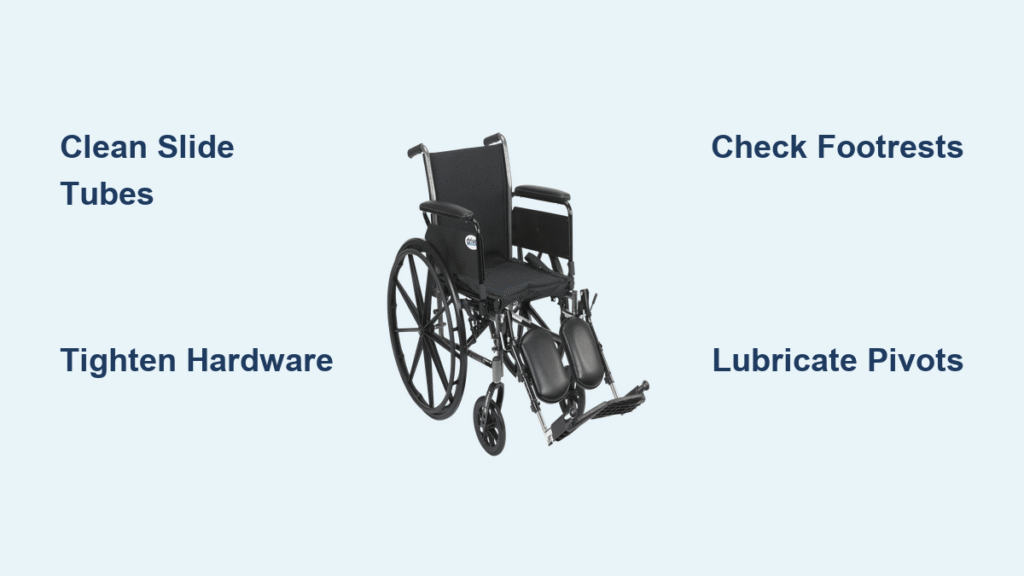
Most folding failures originate from three critical trouble spots: gunk-clogged slide tubes, loose cross-brace hardware, or footrests physically blocking the frame collapse. Ignoring these issues leads to uncomfortable seating (as the chair opens only partially) and eventual complete folding failure. Within this guide, you’ll discover exactly how to diagnose your specific obstruction, apply manufacturer-approved lubrication techniques, and perform precise hardware adjustments—all using common household tools. Let’s get your Drive wheelchair folding reliably again.
Why Your Drive Wheelchair Refuses to Fold (Common Causes)
When your Drive wheelchair won’t fold properly, one side typically stays rigid while the other moves slightly, creating that frustrating “half-open” position. This happens because the X-frame crossbars can’t pivot inward due to specific mechanical obstructions. The top three culprits—accounting for nearly all folding failures—require immediate attention before permanent damage occurs.
Cross-Brace Hardware Failure Signs
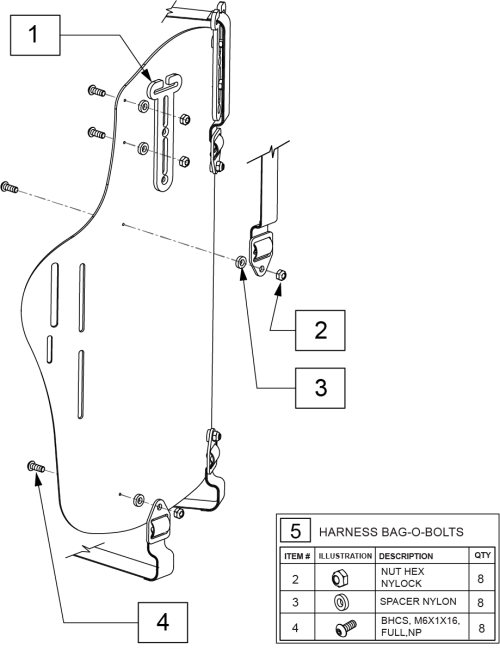
Loose or missing nylock nuts on pivot bolts cause the most frequent folding failures. As these critical fasteners back out, nylon bushings crack or disappear entirely, leaving metal-on-metal grinding. Check both sides of the cross-brace joints while attempting to fold—you’ll hear distinctive clicking if bolts are loose. Left unaddressed, this creates frame misalignment where one side collapses while the other remains locked open. Never overtighten bolts to compensate; this creates dangerous binding that bends frame tubes.
Slide Tube Obstruction Symptoms
Dirt, hair, and dried lubricant inside the seat rails create the second most common folding failure. Run your hand along the slide tubes where the frame collapses—you’ll feel grit or resistance. Rust spots or dents from curb impacts worsen this problem, physically blocking the tubes from sliding past each other. Users often mistake this for “broken hardware,” but you’ll confirm it by noticing smooth movement on one side while the other sticks consistently during folding attempts.
Footrest Interference Danger
Detachable footrests left in the down position physically prevent cross-brace collapse. This often happens after quick transfers where users forget to raise leg rests. The obstruction creates dangerous leverage—forcing the fold can permanently kink crossbars. Always verify footrests are fully raised or completely removed before attempting to fold. If your chair suddenly won’t fold after a routine transfer, check this first before disassembling hardware.
Quick Visual Diagnosis: 2-Minute Check for Stuck Frames

Before grabbing tools, perform this targeted inspection to pinpoint your exact failure point. Stand behind your wheelchair on level ground with brakes locked, then attempt to fold slowly while observing these critical areas.
Cross-Brace Joint Inspection Protocol
Focus on the pivot bolts where the X-frame crosses near the seat rails. Look for:
– Missing nylock nuts (should cover the bolt threads completely)
– Cracked bushings (check for hairline fractures in the white nylon spacers)
– Bent crossbar tubing (hold a straight edge against the frame)
If you see daylight between the nylock nut and frame, that’s your problem. A single loose bolt on one side causes the entire chair to bind during folding. Note which side resists movement—this indicates where hardware has failed.
Slide Tube Blockage Identification
Shine a flashlight into the top of each slide tube where the frame collapses. You’ll see:
– Hair/dirt buildup (looks like fuzzy gray clumps)
– Rust spots (reddish-brown patches inside tubes)
– Dents (visible deformations from impacts)
Run a thin screwdriver along the inner tube surface—you’ll feel resistance at blockage points. If one tube slides smoothly while the other sticks, you’ve found your culprit. Never force folding past this point; you’ll compound the damage.
Clean & Lubricate Slide Tubes for Smooth Folding
Time required: 10 minutes
Difficulty: Beginner (no tools needed)
Critical success factor: Using the right lubricant
Proper Cleaning Technique for Slide Tubes
- Lock brakes and remove seat cushion for clear access to slide tubes
- Wipe visible debris from tube openings with a dry microfiber cloth
- Insert a rag-wrapped screwdriver into tubes to dislodge packed dirt
- Apply SAE 30 heavy machine oil (not WD-40) directly into tube openings
- Work the frame open/closed 8-10 times to distribute lubricant
- Wipe excess oil to prevent dirt attraction
Pro tip: For stubborn grime, use isopropyl alcohol on a cloth-wrapped rod to dissolve old lubricant before applying fresh oil. WD-40 users report temporary fixes lasting only 3-4 days before binding returns—SAE 30 oil maintains smooth operation for months.
Lubrication Mistakes That Worsen Folding
- Over-lubricating creates a dirt magnet inside tubes
- Skipping frame movement after oiling prevents even distribution
- Using silicone spray on metal-on-metal joints (causes sludge buildup)
Tighten Cross-Brace Hardware Without Overtightening
Tools required: 10mm or 13mm wrench, flat-head screwdriver
Time required: 12 minutes
Critical warning: Overtightening causes permanent frame binding
Precise Hardware Adjustment Process
- Locate pivot bolts on both sides of the X-frame crossbar
- Hold bolt head stationary with screwdriver to prevent rotation
- Tighten nylock nut to hand-tight plus ¼ turn only
- Test fold movement immediately—frame should pivot freely
- Replace cracked bushings with exact ⅜” ID × ⅝” OD × ¼” nylon spacers
Drive Medical’s torque specification is 30-35 in-lb—equivalent to firm hand pressure plus minimal wrench movement. If resistance returns within days, worn bushings need replacement. Measure your existing bushings before ordering spares; most Silver Sport and Cruiser III models use standard ⅜”-16 thread hardware available at hardware stores.
Model-Specific Fixes for Drive Medical Silver Sport & Cruiser III
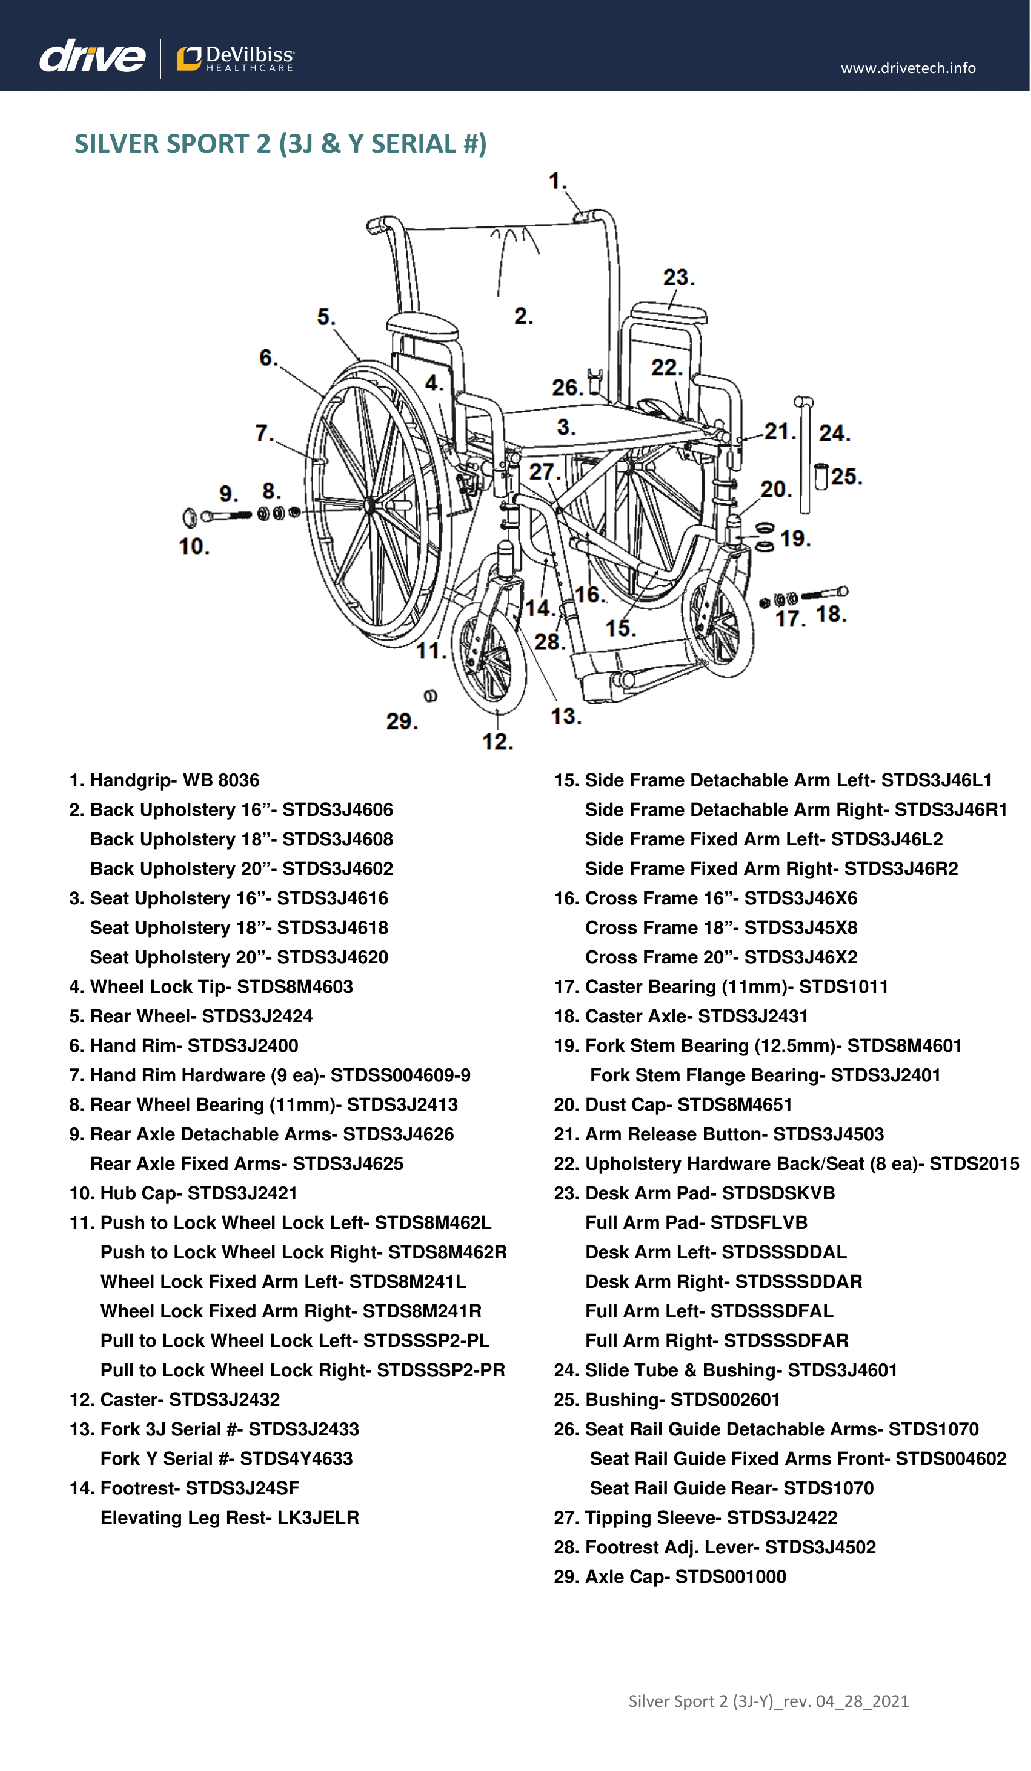
Drive Medical’s popular models share identical folding mechanisms but require specific part specifications. For Silver Sport, Blue Streak, and Cruiser III wheelchairs:
Critical Hardware Specifications
- Nylock nuts: ⅜”-16 thread (standard at auto parts stores)
- Bushing dimensions: ⅜” inner diameter × ⅝” outer diameter × ¼” thickness
- Torque limit: 30-35 in-lb (exceeding this bends frame tubes)
Quick-release axle models add complexity—remove wheels only if necessary for transport. Press the center hub button while pulling wheels straight out. When reinstalling, listen for the distinct click confirming proper engagement; improper seating causes frame misalignment during folding.
Critical Safety Steps Before Folding Your Wheelchair
Never force a stuck fold—this bends crossbars permanently and voids Drive Medical’s 3-year frame warranty. Always:
– Work on level surfaces to prevent tipping during adjustments
– Lock brakes firmly before any folding attempt
– Lift by the frame tubes, never footrests (which can snap off)
– Verify folded stability before transport—properly maintained chairs stay closed without straps
If you notice cracked frame welds, visible crossbar bends, or persistent binding after lubrication, stop immediately. These require professional service—DIY repairs risk catastrophic failure during use.
Prevent Future Folding Failures With Simple Maintenance
Skip monthly maintenance and your Drive wheelchair will inevitably develop folding issues. Implement this manufacturer-approved schedule:
Weekly Folding Readiness Check (90 seconds)
- Verify footrests are fully raised before folding
- Wipe slide tubes with dry cloth to remove surface debris
- Visually confirm nylock nuts cover all pivot bolts
Monthly Deep Maintenance (7 minutes)
- Apply thin coat of SAE 30 oil to all pivot points
- Operate folding mechanism 4 times to distribute lubricant
- Check bushings for compression cracks
Annual Overhaul (25 minutes)
- Remove wheels for full slide tube access
- Clean tubes with isopropyl alcohol and cloth-wrapped rod
- Replace bushings showing wear (even if not cracked)
Quick-Reference Folding Checklist for Daily Use
Follow this sequence every time to prevent folding failures:
1. Position chair on flat, stable surface
2. Lock both brakes firmly
3. Raise footrests completely or remove detachable leg rests
4. Stand directly behind chair for proper leverage
5. Grasp center seat upholstery (not frame edges)
6. Pull upward steadily until latch clicks closed
7. Verify folded stability before lifting
When to Call a Professional for Wheelchair Repair
Seek certified technician help immediately if you observe:
– Visible bends in crossbar tubing
– Cracks in frame welds (especially near pivot points)
– Persistent binding after two complete lubrication cycles
– Stripped bolt threads or damaged nylock nuts
Drive Medical’s warranty covers frame defects for 3 years and components for 1 year—contact your provider before attempting complex repairs. For out-of-warranty chairs, professional service costs $75-$150 but prevents dangerous failures from improper DIY fixes.
Final Note: A properly maintained Drive wheelchair should fold smoothly with minimal effort. By addressing slide tube obstructions, maintaining precise hardware tension, and following the model-specific maintenance schedule, you’ll eliminate most “drive wheelchair won’t fold” issues permanently. Implement the weekly checks starting today—your next folding attempt should take seconds, not minutes of struggle. For immediate reference, keep the spare parts guide (nylon bushings, ⅜”-16 nylock nuts, SAE 30 oil) in your vehicle’s glove compartment whenever traveling.