Flying internationally with your wheelchair shouldn’t mean gambling with your mobility. Yet airlines mishandle 29 mobility devices daily, and 30% of wheelchair users face damage during air travel. If you’re searching for how to pack wheelchair for flight international without risking your essential equipment, this guide delivers the exact steps to protect your chair from check-in to destination. You’ll learn airline-specific requirements, battery handling protocols, and damage prevention tactics that most travelers overlook—ensuring your independence stays intact across borders.
This isn’t just about packing; it’s about strategic advocacy. Unlike standard luggage, your wheelchair is medical equipment requiring proactive intervention at every stage. By following these airline-compliant procedures, you’ll bypass common pitfalls like battery confiscation, lost components, or denied cabin storage. Most critical errors happen before you reach the airport—this guide fixes that with actionable steps verified by aviation accessibility regulations.
Book Wheelchair Space with Airline Immediately After Flight Purchase
Contact your airline within 24 hours of booking to lock in wheelchair accommodations. Airlines operate on a first-come basis for cabin storage, and delays risk gate-checking your chair. When calling, specify your exact wheelchair dimensions (length × width × height × weight), type (manual folding/rigid or powered), and battery details if applicable. For powered chairs, declare whether you use wet cell, dry cell, or gel cell batteries—this determines if you can keep batteries installed.
Critical requests to make during this call:
– Submit a Special Service Request (SSR) detailing transfer needs and required assistance
– Request aisle chairs with flip-up armrests for boarding
– Insist on bulkhead seating for extra legroom during transfers
– Confirm wheelchair storage location on your specific aircraft model
Avoid peak travel days like Fridays when staff shortages increase mishandling risks. For international connections, demand minimum 3-hour layovers—this buffer prevents rushed transfers that damage chairs. Airlines often hide wheelchair policies in fine print; force them to email your confirmed accommodations before departure.
Remove and Protect Detachable Wheelchair Components 48 Hours Pre-Flight

Detach these vulnerable parts 2 days before travel:
– Seat and back cushions (store in padded carry-on bag)
– Armrests, side guards, and footrests (wrap in bubble wrap)
– Joystick controllers (powered chairs only—use anti-static bags)
– Headrests and lateral supports (label each part with destination address)
Pro damage prevention technique: Create a “wheelchair skeleton” by removing all non-essential components. Wrap exposed cables in foam pipe insulation and cover wheel rims with cardboard circles cut to size. If using a wheelchair travel case, secure it with bungee cords—not zip ties that airport staff might cut. Never leave detachable parts attached; 68% of damage occurs when components snag during baggage handling.
Secure Power Chair Batteries to Avoid Confiscation

Battery mishandling causes 41% of international wheelchair travel delays. Before arriving at the airport, disconnect your battery following the manufacturer’s procedure. For wet cell batteries (flooded lead-acid), confirm the airline will accept them—many international carriers prohibit these. Dry cell (AGM) and gel cell batteries are universally permitted but require terminal protection.
Execute these battery steps:
1. Tape both battery terminals with non-conductive electrical tape
2. Pack battery in a plastic container with absorbent material
3. Bring your original charger with universal voltage adapter
4. Keep charger in carry-on luggage (never checked)
Verify destination country voltage compatibility (110V vs 220V) during booking. Airlines like Virgin Atlantic require battery removal documentation—obtain this in writing during your pre-flight call. Failure here means your chair won’t function upon arrival.
Pack a Wheelchair Emergency Repair Kit in Carry-On Luggage
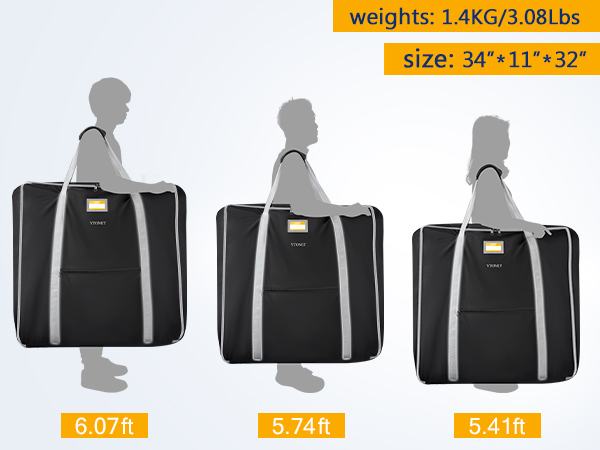
Your repair kit must survive being separated from your wheelchair. Store these essentials in a TSA-compliant clear bag inside your carry-on:
Non-negotiable repair items:
– Duct tape (wrap around water bottle for compact storage)
– Mini Allen wrench set (metric and standard)
– Replacement screws in labeled pill containers
– Tire pump with pressure gauge (for pneumatic wheels)
– Zip ties (heavy-duty, 8-inch length)
Medical continuity must-haves:
– 7-day medication surplus in original containers
– Copy of prescriptions translated into destination language
– Portable pressure-relief cushion (for flight seating)
– TSA Pre-Check card (reduces screening delays)
Pro tip: Attach a laminated card to your wheelchair frame listing repair kit contents and emergency contacts. Airport staff often discard “loose” bags they find attached to chairs.
Arrive 3 Hours Early for International Wheelchair Check-In
Battery-powered wheelchair users must arrive 1 hour before standard check-in times. At the counter, demand verification of these critical items:
– Gate check tags showing your final destination (not connecting hubs)
– Physical inspection of wheelchair storage tags
– Written confirmation of pre-boarding authorization
– Verification that detachable parts will be stored in aircraft closet
Common mistake: Accepting generic “baggage claim” tags. Insist on tags labeled “MEDICAL EQUIPMENT” with your seat number. During security screening, present your SSR documentation immediately and request private screening—TSA agents must accommodate mobility disabilities but won’t initiate this. Never proceed through metal detectors; powered chairs require manual inspection.
Demand Pre-Boarding to Store Wheelchair in Aircraft Cabin
The Air Carrier Access Act guarantees cabin storage for at least one folding manual wheelchair on aircraft with 100+ seats. To claim this space:
– Arrive at gate 45 minutes before boarding
– Present pre-boarding pass to gate agent
– Physically verify closet space before deplaning
– Request flight attendant stow detachable parts in closet
When cabin storage is unavailable (common with rigid frames), require verified gate check tags that travel with your chair through all connections. Take photos of your wheelchair’s condition from all angles before gate check—this documentation prevents “pre-existing damage” disputes later. Airlines like Qantas offer seat-strapping for two manual chairs; ask specifically about this option.
Photograph Wheelchair Condition Before Gate Check
Damage claims fail without proof. Before handing over your wheelchair:
– Capture high-resolution images of all components
– Note existing scratches with timestamps
– Film a 360-degree video showing functionality
– Share copies with airline staff and keep cloud backup
International claim secret: Request the Complaint Resolution Officer (CRO) at your destination airport—this bypasses local baggage handlers who often deny claims. Under Montreal Convention rules, airlines must repair or replace damaged mobility devices within 24 hours internationally. If denied, cite “Annex 17” of civil aviation regulations requiring immediate resolution.
Research Local Wheelchair Rentals Before Landing
Assume your wheelchair might not arrive functional. Pre-land preparation includes:
– Saving contacts for 3 wheelchair rental companies at destination
– Downloading offline maps of accessible routes
– Installing translation apps with “wheelchair repair” phrases
– Noting embassy locations for emergency assistance
Critical action: Email rental companies before departure to confirm compatibility with your chair model. In Japan, for example, narrow sidewalks require specific chair widths—verify this matches your backup option. Carry $200 cash for immediate rental deposits if your chair is damaged.
Choose Airline-Specific Wheelchair Policies for Virgin Atlantic, EasyJet, Qantas
Virgin Atlantic stores compact wheelchairs in cabin closets but requires 72-hour battery documentation. EasyJet permits two free mobility items but mandates pre-booked aisle chairs. Qantas provides wheelchair-accessible toilets on A380 flights—specify this aircraft when booking. Always confirm policies change quarterly; call 14 days pre-flight for updates.
Airline red flags: Avoid carriers without dedicated accessibility teams. If staff can’t name their CRO during pre-flight calls, switch airlines. Check DOT’s Air Travel Consumer Report for each airline’s mobility device mishandling rate—some exceed 40%.
Execute Final Pre-Departure Checklist 24 Hours Before Flight
48 hours out:
– Confirm wheelchair dimensions match airline records
– Charge all electronics (chair + repair kit tools)
– Print medical documents in destination language
24 hours out:
– Pack repair kit in overhead-accessible carry-on
– Test GPS tracker hidden under seat cushion
– Verify voltage adapter works with chair charger
At curb-side:
– Photograph wheelchair with timestamped phone
– Keep medications and pressure cushion on person
– Confirm gate agent attaches tags to frame (not wheels)
Final Note: International wheelchair travel demands treating your chair as irreplaceable medical equipment—not luggage. Start these protocols 3 weeks pre-flight: contact airlines immediately, document meticulously, and pack like your mobility depends on it (because it does). Airlines legally must accommodate you, but without proactive advocacy, 30% of chairs still arrive damaged. By executing these steps, you transform anxiety into assurance—knowing your independence travels with you, intact. Remember: the most successful travelers don’t hope for smooth journeys; they engineer them. Begin your preparation today, and your wheelchair will roll smoothly across every border.

