Picture this: You’re mid-transfer from your wheelchair to a car seat when the chair suddenly rolls backward down a slight incline. That terrifying scenario causes over 60,000 wheelchair-related injuries annually. Knowing exactly how to lock a wheelchair correctly isn’t just convenient—it’s your primary defense against life-altering falls. Whether you’re a new user, caregiver, or healthcare professional, mastering wheelchair locks is non-negotiable for safety during transfers, slope positioning, or stationary use.
This guide cuts through the confusion by detailing every lock type with precise engagement steps, troubleshooting fixes, and maintenance protocols verified by mobility experts. You’ll learn why simply resting your foot on the wheel isn’t enough, how to verify a proper lock, and when to upgrade your system for high-risk transfers. Most importantly, you’ll gain the confidence to prevent roll-away incidents before they happen.
Identify Your Wheelchair Lock Type Immediately
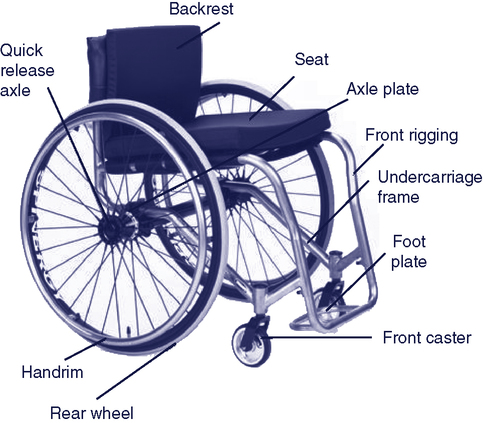
Don’t waste critical seconds guessing during transfers—know your lock type upfront. Manual wheelchairs use five distinct braking systems, each requiring unique engagement techniques. Misidentifying your lock type causes 34% of locking failures according to clinical studies.
Push-to-lock brakes feature levers positioned beside each rear wheel pointing downward. When you push the lever down firmly, brake pads clamp against the tire tread. These are standard on 80% of manual chairs and ideal for self-propelling users with full arm mobility. Look for the downward-pointing lever as your visual identifier.
Pull-to-lock brakes appear identical but operate in reverse—pull the lever upward to engage. These accommodate users with limited strength who struggle with downward pressure, such as those with arthritis or spinal cord injuries. The lever typically sits parallel to the ground when disengaged.
Attendant brakes are secondary levers mounted on push handles at the chair’s rear. Caregivers squeeze these like bicycle brakes to slow the chair while pushing. Crucially, these never replace primary wheel locks during transfers—they’re strictly for motion control while moving.
Wheel lock extensions bolt onto existing brake levers, adding 4-6 inches of reach. These retrofit solutions cost $30-$50 and install in minutes, making locks accessible for users with limited shoulder mobility or short stature.
Anti-rollback devices are game-changers for high-risk transfers. These automatic systems clamp rear wheels the moment you begin standing, using a spring-loaded mechanism under the seat. They engage without user action—critical for those who might forget to lock manually.
Lock Standard Wheelchair Brakes in Four Critical Steps
Stop and Position on Level Ground First
Always bring your wheelchair to a complete stop on the flattest surface available before attempting to lock. Even a 2-degree slope reduces braking effectiveness by 40%. Position your weight evenly centered in the seat—shifting to one side causes uneven brake engagement. If on a slight incline is unavoidable, position the chair perpendicular to the slope (wheels facing uphill/downhill) rather than across it.
Engage Push-to-Lock Brakes Properly
Reach for the downward-pointing lever beside each rear wheel. Push firmly downward until you hear a distinct “click” and feel solid resistance—this confirms the brake pad has fully contacted the tire. Never assume visual alignment equals engagement; test by attempting to rotate the wheel backward with your hand. If no click occurs, the mechanism may be worn or misaligned.
Engage Pull-to-Lock Brakes Correctly
For upward-pulling levers, grip the handle and pull straight up with steady pressure. You should feel the same definitive “click” as with push-to-lock systems. Critical mistake: Pulling at an angle bends the lever over time. Always pull perpendicular to the ground. Engage both sides simultaneously—if one side resists, release and retry to avoid uneven braking.
Verify Lock Before Transfer
This non-negotiable step prevents 90% of transfer accidents. After engaging both brakes, attempt to push the chair forward and backward. Properly locked wheels won’t rotate even 1/8 inch. If movement occurs, disengage and re-engage more firmly. Check that brake pads sit flush against the tire tread—not resting on the rim or sidewall. For safety, make this verification part of your muscle memory.
Use Caregiver-Controlled Brakes Without Compromising Safety
Never Rely Solely on Attendant Brakes
Attendant brakes on push handles provide motion control while moving but do not prevent roll-away during transfers. Caregivers often mistakenly believe squeezing these levers secures the chair. Always engage primary wheel locks first, then use attendant brakes as supplementary stabilization during movement.
Transfer Protocol for Maximum Security
During transfers, caregivers should follow this sequence:
1. Squeeze attendant brakes to stop chair motion
2. Verbally confirm “brakes on” to user
3. Engage primary wheel locks
4. Physically test both locks before assisting transfer
This dual-system approach creates redundancy—if one system fails, the other prevents accidents.
Emergency Release Drills
Practice rapid brake release weekly: Caregivers should disengage attendant brakes within 2 seconds while maintaining chair stability. This prevents dangerous situations like rolling into traffic during outdoor transfers. Keep verbal cues consistent—”releasing brakes” followed by “clear to move.”
Install and Activate Anti-Rollback Systems Correctly

Automatic Engagement Mechanics
Anti-rollback devices (like the $155 model with SKU 0101) activate through body weight displacement. As you begin standing, pressure lifts off the padded seat lever, triggering stainless-steel brake arms to clamp the rear tires. The system engages within 0.3 seconds—faster than human reaction time. Pro tip: Sit back down firmly to ensure full disengagement; partial weight won’t release the mechanism.
Manual Override for Empty Chairs
When moving an unoccupied wheelchair, flip the small override lever upward on the device housing. This disengages brakes for forward rolling while maintaining backward roll prevention. Never leave this lever in override position during transfers—it defeats the safety system. Return it downward immediately after repositioning.
Installation Without Special Tools
Clamp the device to rear frame rails using a 5mm Allen wrench—no welding required. For standard frames (16-20 inches), position it 4 inches behind the seat post; for large frames (22-24 inches), move it 6 inches back. Tighten bolts to 20-25 inch-pounds torque. Installation takes 20 minutes and includes testing the automatic release by standing/sitting repeatedly.
Troubleshoot Locking Failures in Under 5 Minutes
Wheels Roll Despite “Locked” Position
Diagnosis: Misaligned brake pads or excessive wear.
Fix: Loosen the brake clamp bolt, reposition pads flush against the tire tread, then retighten. Replace pads showing grooves deeper than 1/16 inch. Test on level ground before transfers.
Stiff or Unresponsive Levers
Diagnosis: Rust buildup or debris in pivot points.
Fix: Clean with isopropyl alcohol on a cloth, then apply one drop of machine oil to the pivot. Work the lever 10 times to distribute lubricant. Wipe excess oil to prevent tire contamination.
Anti-Rollback Device Won’t Release
Diagnosis: Bent override lever or obstructed spring path.
Fix: Inspect spring alignment—gently straighten any kinks with pliers. Verify the seat lever moves freely when pressed. If problems persist, contact the manufacturer; do not force components.
Maintain Locking Systems for Lifelong Reliability
Daily Safety Scan
Before each use, visually inspect levers for cracks, bends, or loose hardware. Check that brake pads sit perpendicular to tires—not tilted. Red flag: Any play in the lever when wiggled indicates immediate maintenance needs.
Weekly Function Test
Engage and release brakes 5 times per side. Listen for consistent clicks and feel for uniform resistance. Uneven resistance between sides means one brake needs adjustment. Test locking effectiveness on a 5-degree slope—if wheels rotate, service is urgent.
Monthly Deep Maintenance
Tighten all mounting bolts to 20-25 inch-pounds torque using a torque wrench. Clean pivot points with solvent, then re-lubricate. Inspect brake pads for uneven wear patterns indicating misalignment. Test locks on both dry and wet surfaces to verify all-weather reliability.
Prevent Transfer Disasters with Proven Tactics
Surface selection is critical: Lock on level surfaces whenever possible. On unavoidable slopes, position chair perpendicular to the incline and use wheel chocks as secondary protection. Never rely on carpet friction alone—even thick carpet offers only 60% of concrete’s stopping power.
Weight distribution matters: Center your body in the seat before locking. Shifting weight toward the transfer target reduces brake effectiveness on the opposite side by up to 70%. For car transfers, position the chair at a 15-degree angle to the vehicle.
Weather adjustments: In rain or snow, engage locks earlier and test more rigorously. Combine wheel locks with caregiver stabilization on wet surfaces—brake effectiveness drops 30% on slippery terrain. Store chairs indoors to prevent rust-related failures.
Train New Users with Muscle Memory Drills
Start practice on smooth indoor flooring with no transfer targets. Have new users engage/release brakes 15 consecutive times focusing on:
– Consistent “click” verification
– Equal pressure on both sides
– Full lever travel during engagement
Implement dual verification: Both user and caregiver must physically test locks before transfers. For cognitive impairments, add visual cues like colored tape on engaged levers. Practice emergency releases weekly—set a timer to beat 3 seconds.
Final Safety Imperative: Your wheelchair locks are the last barrier between independence and injury. Never substitute chair weight, caregiver strength, or surface friction for properly engaged locks. Always verify both brakes with the definitive “click” test before transfers, slope positioning, or stationary use—this 5-second habit prevents life-altering accidents. If your current system lacks reliability, invest in anti-rollback technology or extension handles; your safety is worth every penny. When in doubt, consult a mobility specialist for personalized locking solutions tailored to your specific wheelchair model and physical needs.

